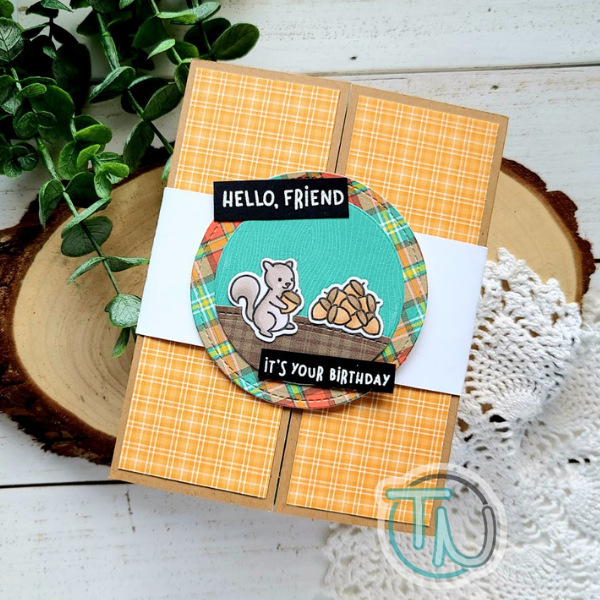
1. Cut card base from kraft cardstock and score at 2 1/8 from each side and crease. Cut 2 plaid panels measuring 1 7/8x5 1/4 and adhere them to either side.
2. Die cut shutter pieces from kraft cardstock and crease the score lines. Cut a woodgrain panel 2 3/4 x 6 and score 1/4 inch from the top and bottom. Cut a white piece of cardstock measuring 3 x 5 7/8 and adhere it behind the woodgrain panel. Then use the circle die from the shutter card components set and run them through your die cutter.
3. Die cut another circle from yellow plaid and using your shutter components adhere it to the inside of your card base.
4. Stamp, color and die cut your images from Let's Go Nuts and Big Acorn however you like.
5. Using Scrappy Tape, adhere your kraft shutter pieces to the inside of your card and then adhere the woodgrain panel over the top of them.
6. Using liquid glue or tape runner adhere your images inside the shutter and on the woodgrain panel however you choose. Don't forget to stamp and heat emboss your sentiments and cut them into strips too. Then close your card up to create the belly band that keeps it closed.
7. Cut a white strip that measures 2 x 8 1/2. Instead of scoring at a specific spot, I just wrap the strip around my card and crease it where it folds. This still gives you over a 1/4 inch overlap to adhere the band together.
8. Die cut a plaid circle with the stitched circle stackables and adhere the woodgrain circle you cut from the inside of your card to it. Cut another woodgrain circle for a ground and use the simple stitched hills to cut the top. Adhere it along with your images and sentiments. Then add the whole circle to your belly band. I glued it over the seam so the band looks seamless but you could put the seam in the back too.
9. Slide your belly band over the top and VOILA your card is all finished and ready to wow the recipient!
I hope you enjoyed today's card. I appreciate you sharing your time with me. Have a fabulous day!

Instagram: @twiddlersnook
Products used:
Lawn Fawn Let's Go Nuts LF2407
Lawn Fawn Cuts Let's Go Nuts LF2408
Lawn Fawn Big Acorn LF2403
Lawn Fawn Cuts Big Acorn LF2404
My Favorite Things Shutter Components MFT-1514
Lawn Fawn Jet Black ink LF1302
Lawn Fawn Stitched Circle Stackables LF795
Lawn Fawn Simple Stitched Hillside Borders LF1054
Tombow mono multi liquid adhesive 52190
Copic Markers: W00, W1, W3, R00, R24, R27, YR02, YR04, Y11, Y13, Y15, YG93, YG95, E43, E44, E31, E34


