
To start, die cut the following images:
- The tiny gift box from brown cardstock.
- The head and main feather piece from brown cardstock.
- The individual tail feathers from the 6x6 Lawn Fawn Knock on Wood paper pack. I used the teal, orange, and yellow.
- The wings from the light brown 6x6 Lawn Fawn Knock on Wood paper.
- The waddle from red cardstock, the feet, beak, and hat band from orange cardstock.
- Use a piece of scrap black cardstock to add behind the turkey face so the eyes will be black. Cut the pilgrim hat from a scrap of black cardstock as well.
- Cut the wavy banner from the double slider surprise die from cream cardstock. Assemble the tiny gift box.
Step-by-step Instructions:
1. Fold on all of the score lines and add double sided adhesive to the outside four tabs.
2. Fold up the tabs to create the box.
3. Add the individual feather pieces to the main feather piece.
4. Add glue to the back of the box and adhere the feather piece.
5. Create the turkey’s face by adding a scrap of black cardstock to the back of the face piece.
6. Inlay the orange beak into the designated space on the face.
7. Add the wings to the sides of the face attaching them along the back.
8. Add the waddle to the turkey’s face.
9. Put together the pilgrim hat.
10. Add the feet to the bottom of the box or the bottom of the face piece.
11. Add your glue to the front of the box then adhere the turkeys’ face.
12. Glue the pilgrim hat to the turkey’s head.
13. Take the center feather piece and adhere it to the lid lining it up with the notch on the back of the box. This is so the box can be opened and closed.
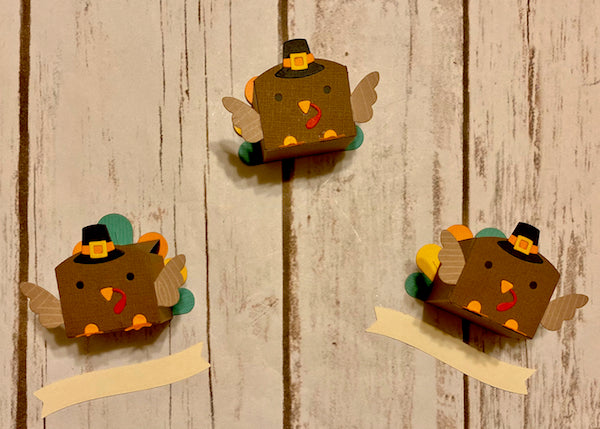
14. Die cut a banner piece and print/stamp/or write the names of your guests and place these in front of the turkey gift boxes.
15. Fill your boxes with a small chocolate or treat.
Products Used:
Lawn Fawn - Lawn Cuts - Tiny Gift Box - SKU: LF1485
Lawn Fawn - Lawn Cuts - Tiny Gift Box Peacock and Turkey Add-On - SKU: LF2051
Lawn Fawn - Lawn Cuts - Double Slider Surprise - SKU: LF1781
Lawn Fawn Glue Tube - SKU: LF1664
Scrappy Tape 1/4” x 30 yds - SKU: ST14
Lawn Fawn Petite Paper Pack - Knock on Wood

