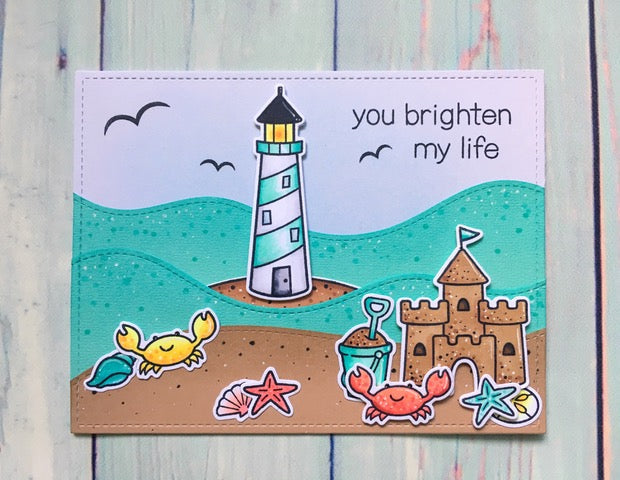
Step 1: I stamped all of the images in the Lawn Fawn Life is Good stamp set, a few of them (crab & shells) I stamped several times each.
Step 2: I then used my Copic Sketch markers to color all the images in coordinating color schemes.
For the aqua colors you see I used BG45, BG15, and G00.
For the yellows, Y00, Y13 and Y15.
The reddish/coral colors were R22, R17 and E93.
The sand was colored using E34, E55, and E57.
I also used a Signo Uni-Ball Impact Gel Pen (White) and a Copic Black Multiliner 0.1 to dot the sand and some of the other images.
Step 3: After coloring all the images, I used the Lawn Fawn Life is Good coordinating die set to cut all of the images. I cut a white rectangle using the Lawn Fawn large stitched rectangle dies for my sky and base. I cut the tan paper with the Lawn Fawn Stitched Hillside Border dies and turned it into the sand. I also cut the aqua colored paper with the Stitched Hillside dies. I added dots with my Copic Markers and my white Signo gel pen to these.
Step 4: I tried several different layouts with my stamped and colored images before deciding on this arrangement. I adhered the images with Ranger Multi-Medium Matte Adhesive.
Step 5: Finally, I used my Scor-Tape to adhere the entire front to my card base. The awesome thing about coloring extra images is it gives you plenty of options for your layout, as well as leaving you images for future cards.
Products used:
Lawn Fawn Life is Good stamp and coordinating die sets
Lawn Fawn large stitched rectangle dies
Lawn Fawn stitched hillside border dies
Ranger Multi-Medium Matte Adhesive
Copic Sketch Markers-
Instagram: @saedilikescrafts


Comment
I LOVE that you give the directions for your cards, but I can’t see the picture of the card (can’t see the card at all) when it’s in the banner at the top. Would be much better if you changed your page design. Thanks!