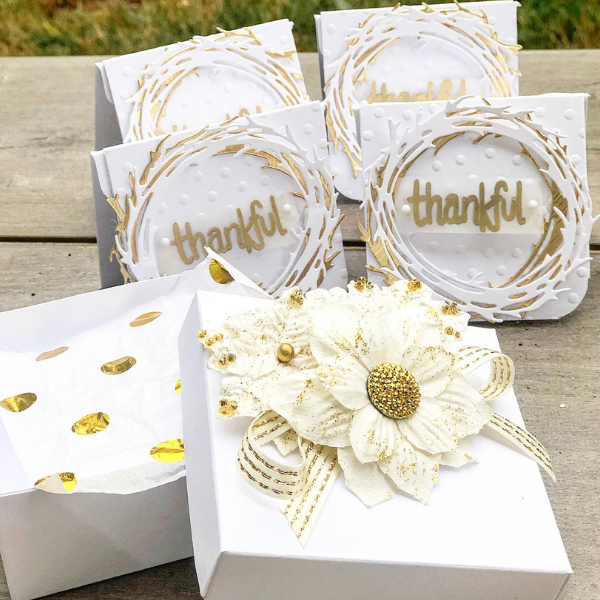
1.Cut down a strip of white card stock to 3 x 6. Score at 3” and use your bone folder to press.
2.Cut down another strip of white card stock to 3 x 3. Use your preferred embossing folder and dry emboss.
3.If desired, use your corner rounder to round the bottom edges.
4.Adhere the embossed piece on top of the 3 x 3 no card using your EZ-Runner grand adhesive.Set Aside.
5.Die cut your Sizzix Funky Wreaths die. Cut one in gold card stock using Gold Hearted Mixed Card pack and one in white card stock.
6.Adhere adhesive to the gold die cut and apply to the top of the embossed card at an angle.
7.Apply 3-D foam squares to the white die cut piece. Try to find a place where the foam square would be hidden. Adhere opposite the gold piece on top of the embossed card. Set aside.
8.Using Lawn Fawndamentals Clear Embossing Ink and Gold ink embossing powder, stamp the word ‘thankful’ from the Bushels of Love stamp set onto vellum. Use your heat tool to wet emboss. Cut it out close to the sentiment.
9.Apply clear dimensional adhesive to both ends in of the Sentiment. If you don’t have any clear adhesive, go ahead and use small foam dots. Apply to the center of the card. give it a little bit of dimension by squeezing upward to create a banner affect.
10.Apply Honey Bee Stamps White Gem Stickers to both ends to camouflage the adhesive.
11.Using your scraps from the Gold Hearted mixed paper pack, cut down a thin strip of paper to 3x1/4 to apply to the inside of the card as decoration.
12.Make an envelope to fit a 3 x 3 card. I used an envelope punchboard.
13.To make the box bottom, cut out a piece of white card stock to 6 1/2 x 6 1/2. Score at 1 1/2 on all four sides. Miter all four corners.
14.At each end of the four sides, slice at the score mark to the score mark. Fold over all the corners and apply hot glue to secure.
15.To make the box lid, cut down a piece of white card stock to 5 1/16 x 5 1/16. Score at 3/4 on all sides. Miter all four corners. Repeat step 14.
16.Add your cards to the box. Feel free to secure them in a plastic bag to keep them down.
17.Decorate the top of the lid as desired. I used flowers and ribbon.
Video:
Lawn Fawndamentals Clear Embossing Ink
Lawn Fawndamentals Gold Embossing Powder
Craft Perfect Gold Hearted Mixed Card Pack
Honey Bee Stamps White Gem Stickers
Catherine Pooler Designs Bushels of Love Stamp Set
Ez Runner Grand Adhesive


