Hello everyone! It’s Sweta, back on the blog for ScrapbookPal.com with a cheerful new design that will have you dreaming of hitting the open road. With warm weather in sight, I felt inspired to create a fun, multi-layered card using the adorable Catherine Pooler Designs Clear Stamps Happy Trail-ers and the coordinating Happy Trail-ers Dies. If you’re ready to learn how I combined ink blending, stenciling, and Copic coloring to make this dimensional adventure, then keep reading for the step-by-step tutorial!
Step 1: Blending the Vibrant Sunset Sky
To start my scene, I focused on creating a seamless gradient for the background. I selected a range of cheerful Catherine Pooler inks: Glam, Flirty Fuchsia, Samba, Be Mine, and Lemongrass.
Using a large blending brush, I ink blended these colors directly onto a white cardstock panel. My goal was a vertical gradient, transitioning smoothly from a deep purple-fuchsia sky to a bright yellow-green ground. I focused Lemongrass at the very bottom, followed by Be Mine and Samba in the middle, and finished the top with Flirty Fuchsia and Glam.

Step 2: Stenciling the Mountain and Tree Backdrop
With the sky complete, it was time to add the landscape using the Catherine Pooler Designs Stencils Peak View.
I positioned the mountain layer of the stencil over the blended sky and applied Catherine Pooler Ink Pad Grape Crush. I used a heavier hand with this rich purple ink near the base of the mountains to give them solid definitions.
Once the mountains were complete, I cleaned and repositioned the stencil to add the cluster of pine trees near the bottom edge. For the trees, I switched to the Catherine Pooler Ink Pad Mardi Gras, applying this vibrant teal-green.

Step 3: Coloring the Star of the Show
Next, I focused on the central image: the vintage trailer from the Happy Trail-ers set. I stamped it onto cardstock using Gina K. Designs Amalgam Ink Pad Obsidian, which is perfect for alcohol markers.
I chose a cool, retro-inspired color palette from my Copic marker collection: W3, W5, W7, BG49, G28, B18, BV08 and RV09. Copic markers give such smooth coloring, allowing me to give the trailer a clean, stylized look. After coloring, I used the coordinating Happy Trail-ers Die to cut it out cleanly.

Step 4: Stamping, Splattering, and Adding Dimension
The scene was almost set, but it needed a finishing touch. I used the small star stamps included in the Happy Trail-ers Clear Stamp Set to stamp small groupings of stars in Grape Crush ink at the top of the dark purple sky.
To give the card more texture and sparkle, I added some fine splatters across the entire scene using Ranger Ink Simon Hurley Solar Spray Cross My Heart. It adds a beautiful, subtle metallic sheen that makes the sky feel magical.
Once all the ink and splatter were completely dry, I took the Spellbinders Poppy Song Collection Dies Playful Stitched Panels. This die creates a double-stitched border. I carefully aligned it on my panel and ran it through my die-cut machine, creating a beautiful framed centerpiece.
![]()
Step 5: Assembly and Final Touches
I began the final assembly by adhering the outside stitched frame directly to an A2 white card base using Bearly Art Precision Craft Glue.
For the central, scenic panel, I wanted extra dimension. I applied Ranger Ink Simon Hurley Create Clear Foam Tape to the back of the scenic panel and popped it up in the center.
Finally, I added the colored trailer, adhering it partially over the mountains and ground, also raising it with more clear foam tape for a full, tiered effect. To make the stars on the stamped trailer sparkle, I added small dots with a white gel pen. And there you have it—a dimensional scene full of color and ready for any "Happy Trails Ahead"!
![]()
I had so much fun bringing this "Happy Trails" scene to life! There is something so rewarding about creating your own colorful, scenic backgrounds, and this stamp set was the perfect motivation to combine my favorite ink blending and stenciling techniques. I hope this project inspires you to grab your favorite inks and markers to create your own outdoor-inspired masterpiece. Happy crafting, and I can't wait to see where your creativity takes you!
Happy crafting ✂️
Sweta
@Table_in_the_Attic
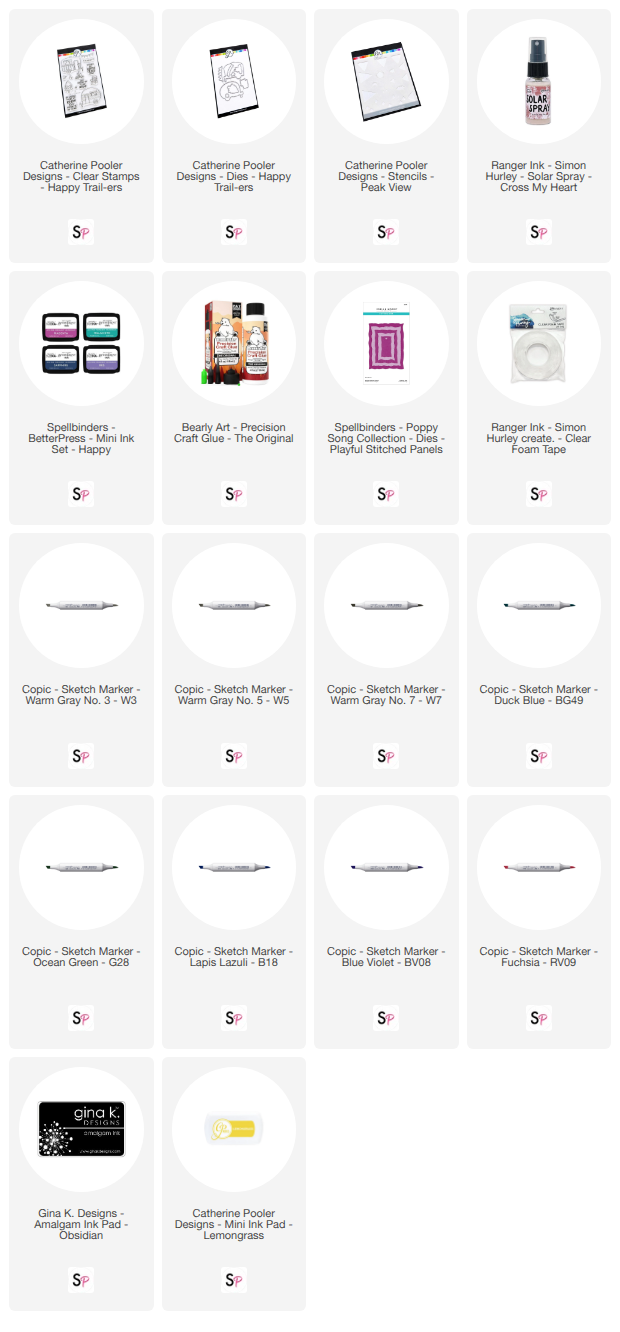
Supplies Used