
Step 1: Cut down your one sheet of acetate into two pieces. They should measure 4 3/4 x 6.
Step 2: Emboss a piece of coordinating card stock (4 x 6)with your favorite embossing folder. I used a heart embossing folder.
Step 3: For the back layering of the card, cut out two pieces of card stock. I cut one gold shimmer piece down to 4 3/4x 6 and one white card stock piece down to 4 1/2 x 6.
Step 4: Cut down one piece of vellum, I used a polkadot vellum to 4 3/4 x 6.
Step 5: Using your embossed piece of card stock, cut down to two pieces. Cut the first piece down to 4 3/4 x1/2. Cut the second piece down to 1 1/2 x 4 3/4. Take the second piece in score in half lengthwise at 3/4”.
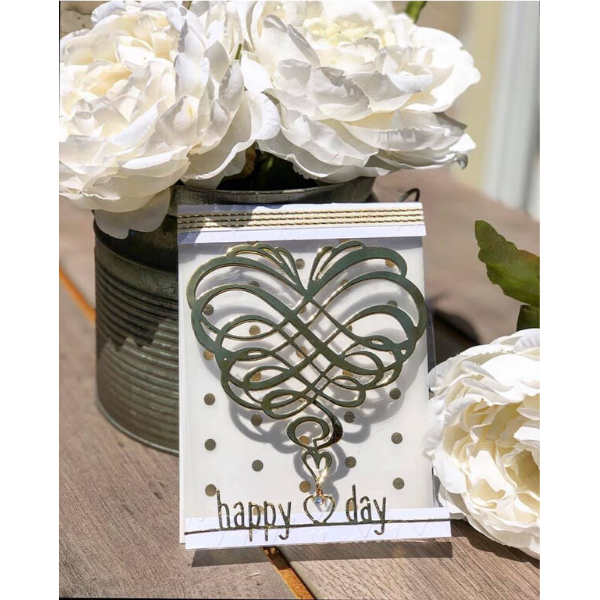
Step 6: Cut your Swirl Heart out twice in gold paper.
Step 7: Cut your Happy Heart Day Line Border out in gold paper.
Step 8: Add adhesive to both pieces of card stock, one of the heart dies in your Happy Heart Day Line Border strip.
Step 9: Add 3-D foam dots to the back of the existing Swirl heart die.Try to place them where you can’t see them from the front.
Step 10: Add your acetate pieces on either side of the embossed card stock that measures 4 3/4 x 1 1/2. Make sure to add the acetate right up to the score mark and secure.Use you bone folder to press.
Step 11: Add 1/4 inch scrappy tape to the top and bottom of the vellum piece and apply it to the back inside of the acetate card.
Step 12: Center some thin ribbon at the top of the card on the embossed piece. Secure all the way around using 1/4inch scrappy tape.
Step 13: Add you 1/2 x 4 3/4 inch embossed piece to the bottom of the front of the card.
Step 14: Add your happy heart day line border strip to the center of that strip. Half should be on the embossed piece and half should be on the acetate. Cut offends if necessary.
Step 15: Finally, grab your sticky Swirl Heart die and apply to the center of the acetate card.Layer the swirl heart die that you added foam dots to on top of that and center.
Step 16: If desired, dangle a small charm at the bottom of the heart
Happy Heart Day Line Border
Spellbinders Shapeabilities Dies - Swirl Heart
Lawn Fawn Acetate
Scrapbook Adhesives 3D Permanent Foam Squares - White 1/2" x 1/2", 126 pk
Scrapbook Adhesives E-Z Runner Grand Refillable Dispenser
Scrapbook Adhesives E-Z Runner Grand Refill - Permanent Strips

