Hi everyone, it’s Ricky from Bromerocards, and I am here to share a project using some supplies from ScrapbookPal.com.
Just a little about me before we get to the card. I live in Chicago, IL, and have been making cards for about 4 years. I fell in love with the hobby, and I have not looked back. I love all the different styles of cards you can make. It never gets boring, and the best part is making people smile with my cards.
Anyway, let’s get to the card!
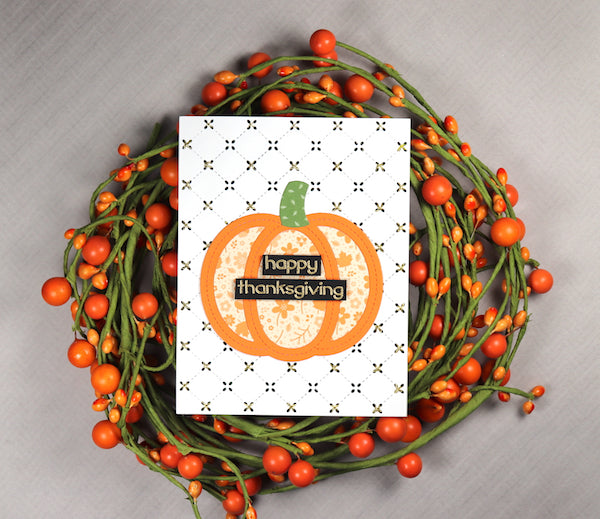
First, I used the Stitched Pumpkin Frame die to cut the pumpkin out of Lawn Fawn Fake Tan cardstock. Then I also cut a pumpkin out of some pattern paper in the Lawn Fawn Fall Fling 6x6 paper pack. The insides of the fake tan pumpkin and the frame of the pattern paper pumpkin can be set aside and used for another card. I then took the stem and die cut that out with the green pattern paper from the same pad.
Then we put the pumpkin together on a piece of typing paper. This helps when gluing the pumpkin onto the quilted card panel (instructions ahead). Fussy cut the pumpkin so that no white paper is showing behind it. I like to peel back the typing paper just a bit and cut underneath the pumpkin.
Next, we cut out the card panel using the Quilted Background die by Lawn Fawn. It took me a few minutes to get out all the little dots from the background, but the card is worth the time. I then took some DMC gold thread and did cross stitched patterns on the outside holes, and then every other horizontal line.
Then glue the pumpkin down onto the quilted panel and place a few heavy things on top to make sure it sticks to the paper.
While that is drying, I took some black card stock from my stash and prepped it for embossing by rubbing it with an Anti-Static Pouch. Next, I stamped the sentiment Happy Thanksgiving from the Forest Feast stamp set using the VersaMark Watermark Stamp Pad and covered it with some gold embossing powder. Use your heat gun to melt the embossing powder. Place some Foam Tape on the back of the sentiments and adhere to the middle of the pumpkin.
Last, put some Foam Tape on the back of the quilted panel. Use plenty as we don’t want the card to sink when putting through the mail. Then place the sentiments stacked in the middle of the pumpkin. Finally, take a card base cut at 11 x 4.25. Fold it in half with a bone folder and place the panel on the base carefully so that it remains even on the card.
I hope you enjoyed this card, and I look forward to seeing some of your creations!
Happy crafting,
Ricky
Products Used:
Lawn Fawn Clear Stamps - Forest Feast
Lawn Fawn - Lawn Cuts - Stitched Pumpkin Frame
Lawn Fawn - Lawn Cuts - Quilted Backdrop
Lawn Fawn Petite Paper Pack - Fall Fling
Lawn Fawn Embossing Powder - Gold
Tombow Double-Sided 3D Foam Tape
Gold DMC thread


