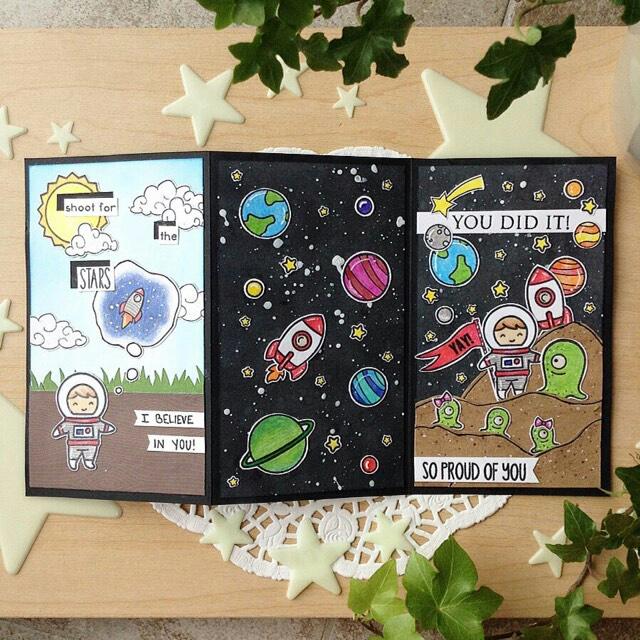
Step 1: take a sheet of 7.5 by 11 cardstock and score it into 3 even sections. Make the first fold away from you, and the second fold towards you to form an "accordion"
Step 2: set aside and cut down 3 panels slightly smaller
Step 3: for the first panel, I used my Distress Inks in Salty Ocean to create the sky. For the second and third panels, I used Salty Ocean and tons of Memento Tuxedo Black ink to get the dark sky. Then I splattered watered down acrylic paint to get a starry effect.
Step 4: for the first panel, I hand drew and cut out a grassy border and used a woodstock paper for the ground. In the third panel, I took Kraft cardstock and colored over it with colored pencils to give it a more layered look.
Step 5: I used images from Lawn Fawn's Out of this World and Monster Mash and Hero Art's Raining Cats and Dogs. I colored those in with pencils.
Step 6: after adhering those images, I went in with a touch of glitter in the cloud and added glossy accents on the aliens' eyes and astronauts ' helmets. And then you have an awesome tri-fold space card!
Instagram: @chloescorner4cards
Products Used:
Lawn Fawn's black cardstock
Tim holtz Distress Ink in Salty Ocean
Tim Holtz ink dabbers - Alternative: Tsukineko Sponge Daubers
Lawn Fawn Out of this World Dies
Lawn Fawn Out of this World Stamps
Lawn Fawn Monster Mash Dies
Lawn Fawn Monster Mash Stamps
Lawn Fawn Knock on Wood paper pad


