
Step 1:
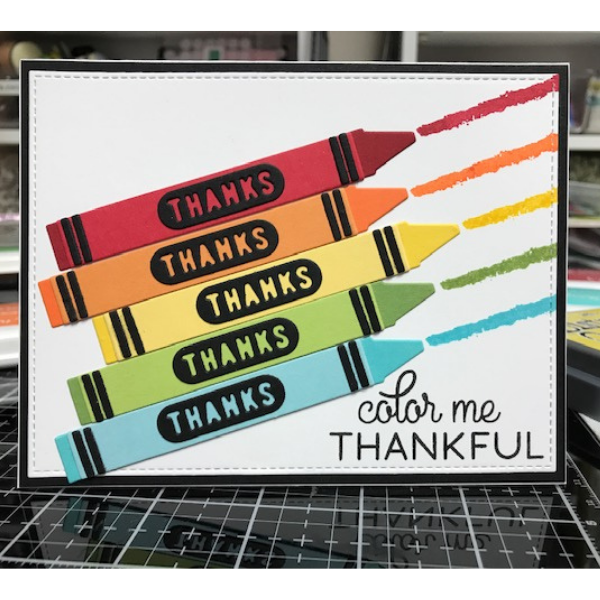
Cut out and assemble crayons.
I like to have two shades of each color, one for the crayon and one for the wrapper.
There are 4 center sentiments to choose from:
HELLO, LOVELY, FRIEND and THANKS.
Step 2:
Cut out a white card panel from a stitched rectangle that allows you to still put a black cardstock layer behind it.
Step 3:
Stamp your sentiment on the bottom right hand corner in black ink.
Step 4:
Match your ink with the crayon colors you chose.
I like to keep my ink swatches in a plastic coin sheet for easy reference.
Step 5:
Adhere the crayons to the white card panel and stamp the ink line to coordinate with your crayon color.
Step 6:
Mount on a black panel and adhere to a white A2 card base.
These are so fun to make with different color combinations and different sentiments.
Here is another example where I used a mini slim size card.
Instagram: @kaycbyk
Products Used:
Concord and 9th Color Me Happy Dies - SKU: 11038
Concord and 9th Color Me Happy Stamps - SKU: 11037
Cardstock colors: white, black, reds, oranges, yellows, greens, aquas, blues, pinks and purples
Versafine - Onyx Black Ink - SKU: VF-082
Matching inks to cardstock
Distress Oxide Ink-Mustard Seed - SKU: TDO-56089
Lawn Fawn Glue Tube - SKU: LF1664

