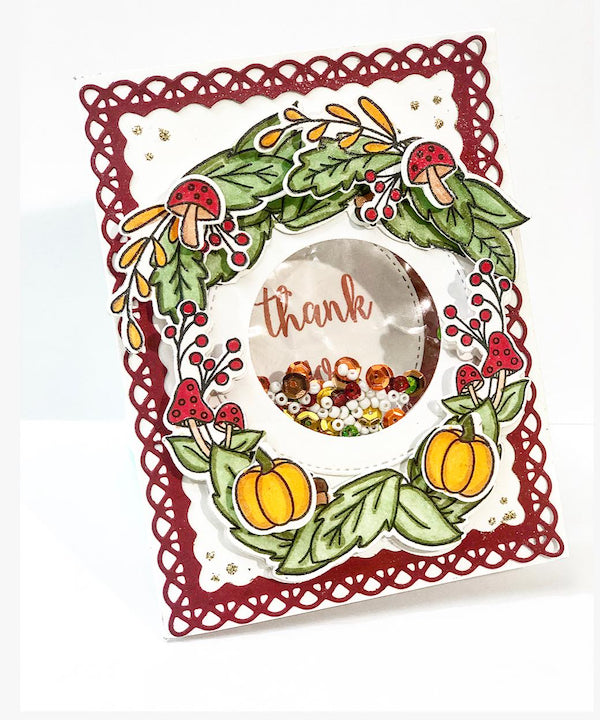
1) Using the Fall Foliage Stamp set by Avery Elle, stamp the largest wreath image 3 times and the smallest wreathe image twice. I used Gina K Designs Amalgam Ink in Jet black.
2) Color the images as desired. I used Copic Sketch markers in the following colors: Pea Green, Olive, Willow, Lipstick Red, Chrome Orange and I blended with a Colorless Blender.
3) Using the Fall foliage Die Set, cut out the wreath images to create your layers.
4) Stamp two each of the Pumpkin and Mushroom images from the Foliage Stamp Set.
5) Color the images as desired. I used the following Copic Sketch markers: Lipstick Red, Light Suntan, Dark Suntan and Chrome Orange.
6) Cut the images using the Fall Foliage Die Set.
7) Using Card Blanks and Envelopes Tonic Studios, cut a circle out of the front of your card. Try to center as best as possible. Spellbinders Nestibilities - Hemstitch set is perfect for this card.
8) Create a shaker pocket on the circle, using a clear bag. Use 1/4" Scrappy Tape to secure the bag to the perimeter of the card. Add your choice of sequins. Secure the opening of the bag with Scrappy Tape. Cut off excess.
9) Create and outer circle layer to cover any parts you don't want shown or to add interest.
10) Use the circle negative to stamp "Thank You" on the card with Gina K Designs Autumn Ink Cube Collection. Create an ombre effect using two different colors. I used Faded Brick and Tomato Soup.
11) Create a rectangle layer around the front of the card and adhere. I used a die from stash. You can do a simple scalloped rectangle stacking die like the one from Lawn Fawn.
12) Add Pop Up glue Dots to the backs of the small wreaths, and one set of the large wreath.
13) Position the large wreath (with no pop up) directly under the shaker circle. Add the dimensional layer on top.
14) Position the last layer of the large wreath (cut of ends as seen in video) directly over the top of the shaker circle. Add the two layers of the small wreath (should be popped up)
15) Add Pop Up Glue Dots to the pumpkins and mushrooms. Position them as desired to create another layer of dimension.
16) Finish your card by adding a it of sparkle. I used Gold Stickles. Add to the card as desired. I added three dots to all four corners of the card.
17) Use the smaller pieces of the stamp set to add fun decorations to the side of the envelope.
Products Used:
Avery Elle Clear Stamps - Fall Foliage
Avery Elle Elle-ments Die - Fall Foliage
Craft Perfect - Card Blanks & Envelopes - Bright White, 10 pk
Gina K. Designs Ink Cube Assortment - Autumn
Gina K. Designs Amalgam Ink Pad - Jet Black
Spellbinders Nestabilities Die - Hemstitch Circles (suggested)
Lawn Fawn - Lawn Cuts - Outside In Stitched Scalloped Rectangle Stackables (suggested)
Pop Up Glue Dots
Ranger Stickles Glitter Glue - Gold, 0.5 oz.
Copic Sketch Marker - Olive - G99
Copic Sketch Marker - Pea Green - YG63
Copic Sketch Marker - Willow - G24
Copic Sketch Marker - Chrome Orange - YR04
Copic Sketch Marker - Lipstick Red - R29
Copic Sketch Marker - Light Suntan - E13


