

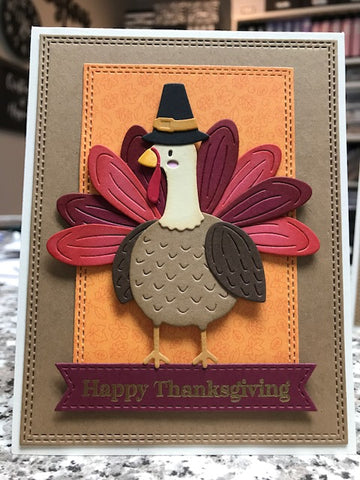
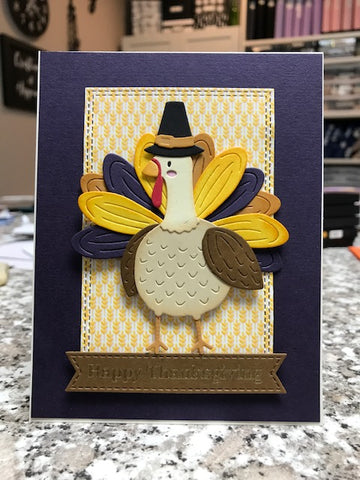
Step 1:
Diecut your Turkey pieces and assemble. I used some Distress inks on the edges for some depth.
Please note: on some of the turkey’s I cut the feathers apart so I could arrange them individually instead of two at a time.
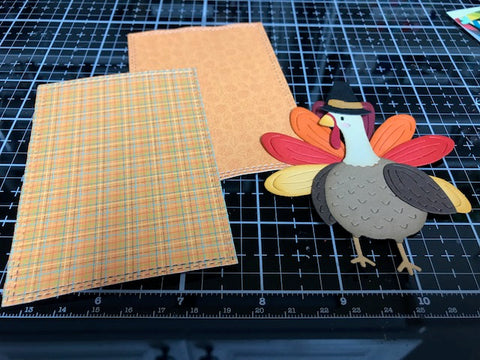
Step 2:
Diecut patterned paper rectangles, card base and background layer ready
Step 3:
Add some foam squares to the back of the turkey.

Step 4:
With the cardstock you have left emboss your sentiment with VersaMark and gold or hot chocolate embossing powder.
Cut out with sentiment strip die.
Add 3 foam squares on the back.

Step 5:
Assemble together to make your card(s). After the card is all assembled I took a very tiny speck of glue and adhered a turkey toe to the sentiment strip to keep them from sticking up.
As you can see I made several.
These were fun to make and would be super cute as place-cards for your Thanksgiving table.


Author: Kay Norman
Instagram: @ kaycbyk
Products Used:
Spellbinders-Happy Turkey Day Dies S3-422
MFT Essential Stitched Sentiment Strips MFT-1878
MFT Essential Stitched Sentiment Strips MFT-1878
Nuvo Embossing powder - Hot Chocolate 612n
Cardstock colors: browns, black, yellows, oranges, reds, cream etc.
Patterned paper- Doodlebugs
Stitched rectangle dies
Happy Thanksgiving stamps from Papertrey Ink


Comment
I love this card! Can you please tell me the name/brand of the stitched rectangles used. Thank you