
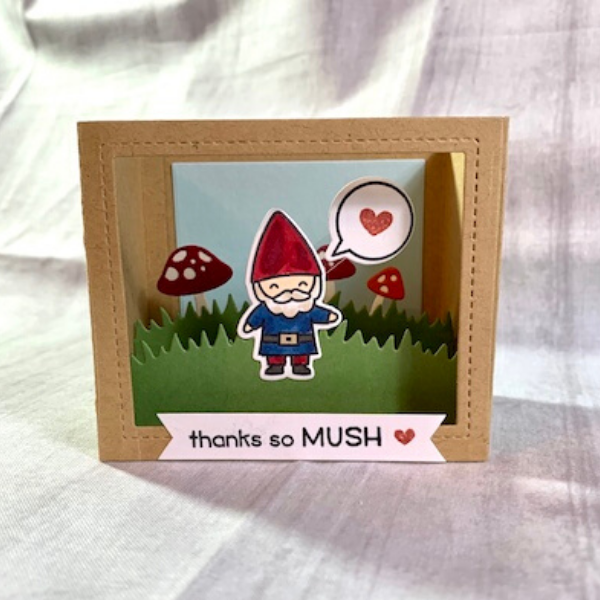
Hey there friends! It’s Cassie here with another tutorial, and today I’m showing you how to make a shadow box card using the Lawn Fawn Shadow Box Card dies. This is such a great die that makes making a shadow box so super easy.
- 1. Cut out two panels using the large rectangular pieces and your die cutting machine. With one of those pieces you are going to add a window. To do that, you’ll need the pierced rectangle die from the set. Line that up and run that through your die cutting machine.
- 2.Using the Shadow Box Card Park Add-on die, cut out two grassy hills from green cardstock.
- 3.Take the Mushroom Border die, and cut out 2 mushroom borders from white cardstock. Cut out one grassy border from green cardstock using that same die.
- 4.To make the caps of your mushrooms, take some scraps of red and orange cardstock and run those through your Xyron Sticker maker. Now take the mushroom cap dies, place those on your red and orange cardstock and run those through your die cutting machine until you have enough caps to cover your mushroom borders. Adhere those to your mushrooms.
- 5.Using the stitched rectangle die from your Shadow Box Card dies, cut out a blue piece for your sky background.
- 6.Stamp and color your gnome and speech bubble from the Oh Gnome! stamp set. Cut those out using the matching dies. Adhere the speech bubble to the gnome using a small piece of acetate.
- 7.Reinforce all of your score lines using a bone folder.
- 8.Put the box together on the left edge by using 1/8” Scrappy Tape.
- 9.Adhere one of your mushroom borders to the back of one of your grass borders from the Shadow Box Card Park Add-on die. Cut off the excess.
- 10.Put 1/8” Scrappy Tape on the scored edges of your grass borders and adhere those to the left-hand side of your partially assembled box. Adhere your blue rectangle sky to the back part of your box.
- 11.Now adhere the right side of the box to the grass borders and close up your box.
- 12.Put a small amount of glue on the bottom back of your gnome and adhere him to the front most grassy border inside your box.
- 13.Stamp out your sentiment, trim it down, and adhere it to the front of your box.
- 14.Taking your extra mushroom border and grass border both from the Mushroom Border die, adhere those to one another. Adhere those to a piece of light blue cardstock.
- 15.Using the smallest pierced rectangle die from the Shadow Box Card die, cut out two panels from your mushroom borders. Adhere those to the sides of the box.
It’s really that simple. I love how Lawn Fawn makes their interactive dies so easy to use and assemble. I hope you were inspired to get crafty and make your own shadow box card.
Thanks for stopping by!
Cassie
Instagram: @cassietcards
Products Used:
Lawn Fawn Lawn Cuts - Shadow Box Card
Lawn Fawn Lawn Cuts - Shadow Box Card Park Add-On
Lawn Fawn Lawn Cuts - Mushroom Border
Lawn Fawn Clear Stamps - Oh Gnome!
Lawn Fawn Lawn Cuts - Oh Gnome!
Xyron 150 Create-a-Sticker Machine – Purple
Tsukineko Memento Full Size Dye Inkpad - Tuxedo Black
MISTI Stamping Tool - Mini 6 x 7"
Tim Holtz Distress Oxide Ink Pad - Fired Brick
Copic Sketch Marker - Strong Red - R46
Copic Sketch Marker - Dark Red - R89
Copic Sketch Marker - Antwerp Blue - B37
Copic Sketch Marker - Prussian Blue - B39
Copic Sketch Marker - Yellowish Shade - YR20
Copic Sketch Marker - Sand White - E42

