
Instructions:
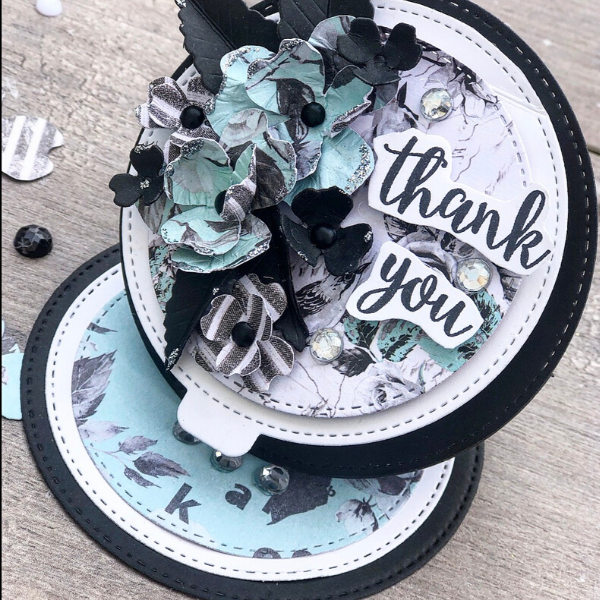
1) Using the Avery Elle Fall Foliage stamp set, stamp your sentiment and fussy cut. Add 3D foam dots to the back of both pieces.
2) Fold your base cardstock in half, using the largest of your circle die – cut your card base. Be sure to leave a little room on the edge of the fold to make it a foldable card. (I used black card stock)
3) Cut a separate piece of cardstock with the largest circle die. This will form the “easel” part of the card. (I used black card stock)
4) Cut the second largest circle die out one time (I used white paper)
5) Cut the third largest circle out three times (I used patterned paper)
6) Cut the fourth largest circle out one time (I used white paper. If you don’t have a 4th die, cut the third largest out four times instead)
7) Cut the desired size of the Life the Flap circle die (I used the largest one) it stays attached – cut along the perimeter to detach it.
8) Cut out the desired amount of flowers/ leaves using the Cinch and Go Four die. ( I cut the middle sizes twice to create layers in pattern and plain paper)
9) Mold your paper flowers and attach them together using brads and hot glue. (Quick tip: use water to make them more pliable)
10) Using your Avery Elle Thanks stamp set, stamp your sentiment on the last size circle you cut – this will be under the Lift the Flap Die.
11) Use scrappy tape to adhere your sentiment to one of the (3) circles you cut. Should be the third largest circle.
12) Grab the card base (the one we folded and cut) and fold ONE side of the circles in half. This is part one of the easel.
13) Apply adhesive to just the bottom half of the half circle and attach the separate circle you cut to this part. The easel is complete.
14) Open the card to reveal the inside. Add two layers of the circles. ( I used 1 white and 1 patterned piece)
15) Working on the card front, center your layered sentiment onto the card front.
16) Add your Lift the Flap Circle die on top of that ONLY adhere on the small part at the top, above the pre-set score mark.
17) Add 3 D foam dots to the last layer circle and apply to the Lift the Flap.
18) Position the Thank you sentiment that we fussy cut earlier to the right side of the flap. (Be sure not to add adhesive beyond the Lift the Flap – it will interfere with the opening of the flap.
19) Add your layered flowers to the card with some hot glue along the left side of the card.
20) Decorate your card with little bling and stickles – if desired.
21) Create a “stop” for the top of the easel card. I used three small pieces of bling for mine. (Tip: You can use this space to pop up a tiny sentiment, image or die cut or flower if desired)
Instagram: @scrapdaworld
Products Used:
Gina K. Designs Amalgam Ink Pad - Jet Black
Lawn Fawn Lawn Cuts - Lift the Flap Circles
Avery Elle Clear Stamps - Thanks Thanks
Spellbinders Shapeabilities Dies - Cinch and Go Four
Avery Elle Clear Stamps - Fall Foliage
Scrapbook Adhesives 3D Permanent Foam Squares - White 1/2" x 1/2", 126 pk
Spellbinders Nestabilities Dies - Hemstitch Circles (substitution)
Spellbinders Nestabilities Dies - Standard Circles, Large (substitution)

