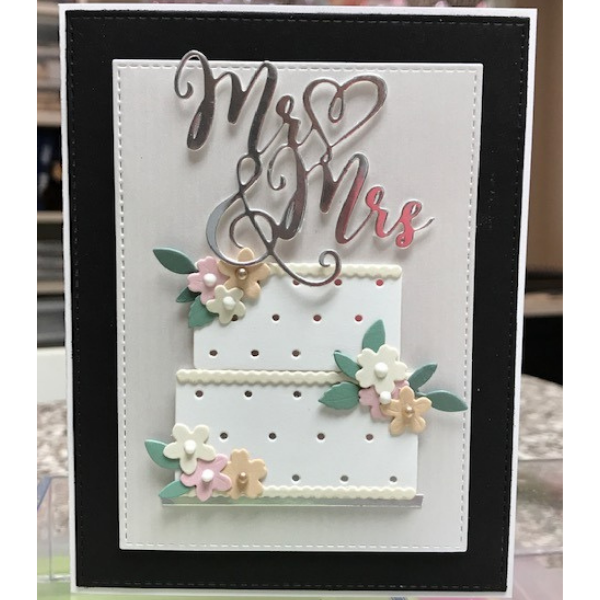
Step 1:
Cut out the cake and frosting borders from white cardstock. Cut flowers and greenery from colored cardstock. Also the Mr. and Mrs. from gold cardstock.
I chose to use the dots in my cake so I taped the die pieces together to make the die cutting
easier.
Step 2:
Add a piece of gold cardstock to the back of the cake so it shows through the holes in the cake. I used the thin adhesive squares to secure the two cake layers together.
Step 3:
Glue on the frosting pieces.
Step 4:
Glue the flowers and greenery to the cake as desired.
Step 5:
Cut out background cardstock layer and stitched rectangle and adhere them to a white card base. Use thin adhesive squares on the back of the cake and adhere.
Step 6:
I like my Mr. & Mrs. to be popped up like my cake so I take one of the larger thin squares and cut it into skinny little strips and adhere to the thickest part of my word die cut piece as shown below.
Step 7:
Adhere to the card above cake.
I also cut a thin piece of gold cardstock and adhered it under the bottom of the cake to tie in the gold from above. It makes it look like a plate.
Step 8:
Use white Nuvo drops for the center of the flowers.
I also added dots on top of the frosting border to give it dimension.
Instagram: @kaycbyk
Products Used:
Tonic Studios Craft Perfect Blue Blossom Paper pad #9377e
Spellbinders Etched Dies - Mr. & Mrs. Wedding cake #S4-1058
LF Glue tube #LF1664
Scrapbook Adhesive THIN 3D Permanent foam squares. White variety pack 217 pack #1616
Nuvo Crystal Drops - Gloss Simply White 651n
iCraft Purple tape - Removable #3389
Navy, pink, white, green and gold cardstock.
Stitched Rectangle die


