
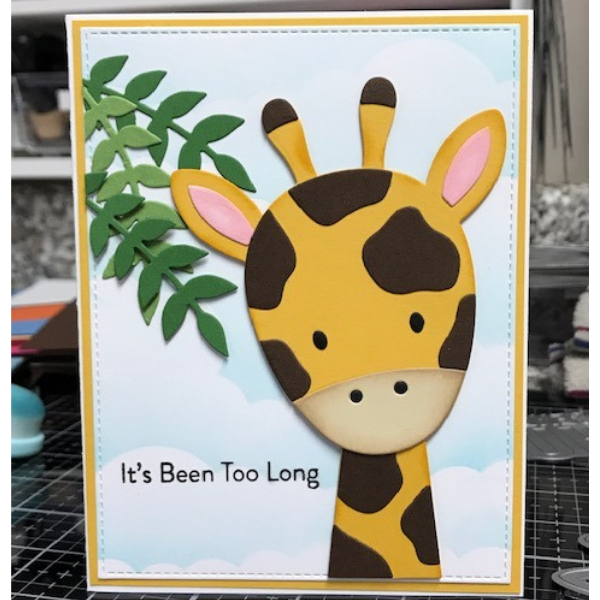
Step 1: Cut out a stitched rectangle out of white cardstock. I used one slightly smaller than an A2 size because I wanted to border it with coordinating cardstock.
Step 2: Ink clouds with Tumbled Glass distress ink and the the Rolling cloud stencil.
Step 3: Stamp your sentiment in black ink.
Step 4: Cut out and assemble the giraffe and neck. I inked the edges for added detail.
Step 5: Add thin foam squares to the back of giraffe and adhere to cloud background. Then adhere to a coordinating color of cardstock and then to an A2 sized card base.
Step 6: Cut some leaves from green cardstock and adhere with liquid glue and thin foam squares. I added some Nuvo Crystal drops in white to the center of the eyes. I made a few more using different coordinating colors of cardstock and the What’s Up sentiment.
Instagram: @kaycbyk
Products Used:
MFT Joyful Giraffe Die-namics MFT-1893
MFT Giraffe Greetings CS-527
MFT Rolling Clouds Stencil ST-143
Distress Ink Tumbled Glass TIM-27188
Scrapbook Adhesive Thin 3D Foam Squares White 217 pack #1616
Lawn Fawn glue tube LF1664
Nuvo Crystal Drops Gloss Simply White 651n
MFT Wild Greenery and Stitched Square Rectangle dies
Cardstock: MFT Milk Chocolate, Cotton Candy
Lawn Fawn Noble Fir, Stampin’ Up Curry
Black, white and linen cardstock, green

