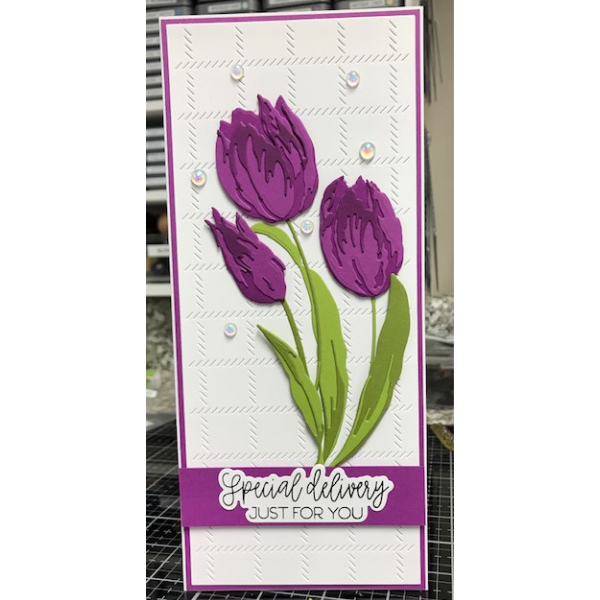
Step 1:
Using the tulip building guide that comes with this die set (I trimmed mine down to fit nicely in my storage envelope) I pulled the colors of cardstock I wanted to make my tulips.
I didn’t have multiple shades in the main color I wanted to use so I used some Tim Holtz Seedless Preserves and another ink color I had on hand to ink blend my cardstock to get some different shades of the same color.
Step 2:
Cut out the tulip layers and leaf layers using the guide. Glue layers together as shown.
Cut out a white background from the Pinkfresh Slim Diagonal stitched plaid background.
Step 3:
Start laying out the tulips and leaves to form a cluster of tulips.
Adhere with glue and thin foam squares as desired.
Step 4:
Stamp your sentiment in black ink and cut out with coordinating die from the Honey Bee Stamps Pickup lines stamp and die set.
Step 5:
Mount your white panel onto the same color of cardstock you used for the tulips and make your slimline card base.
Mount your sentiment on a piece of the same coordinating cardstock and adhere with thin foam squares to your card.
Step 6:
I added some iridescent bubbles to finish off my card.
I love how they pick up the colors in the tulips for a nice touch.
I’m excited to make some more colors of tulips for spring that is hopefully just around the corner.
Instagram: @kaycbyk
Products Used:
Pinkfresh Studios Slim Diagonal Stitched Plaid PF041ES
Altenew Craft-A-Flower: Tulip Layering ALT4189
Honey Bee Stamps - Clear Stamps Pickup Lines HBST-309
Honey Bee Stamps - Honey Cuts Pickup Lines HBDS-309
Cardstock: white, greens.
Plum Punch from Taylored Expressions
Ink: Tim Holtz Distress ink- Seedless Preserves TIM-32847
Scrapbook Adhesive thin foam squares - White 1616
Iridescent bubbles
LF Glue tube LF1664


