

Hello crafty friends! Maureen and Michele here from KreativeKinship to share a fun window card we created with products from Hero Arts and Honey Bee Stamps. Let’s get started!

We started by doing some diecutting. Since our card has a window, we first created a top-folding card base from 120 lb. white cardstock that measured 5.5” x 6”. We then cut a card panel from 80 lb. white cardstock that measured 5” x 5.5” and a mat from gray cardstock that measured 5.25” x 5.75”. We centered the largest blanket-stitched circle die on the panel and ran it through the diecutting machine and repeated this on the gray mat. On the front of the folded card base, we cut a plain circle slightly smaller than the opening left by the blanket-stitched die.

We then gathered pieces of rainbow-colored cardstock large enough to accommodate the house dies and also pieces of green cardstock and 80 lb. white cardstock large enough to accommodate the largest blanket-stitched circle die. These were all run through the diecutting machine.

The houses were stamped using VersaMark and then heat embossed with white embossing powder. We like to die cut first and stamp second as we find that the negative space helps align the stamps better on the die cuts.

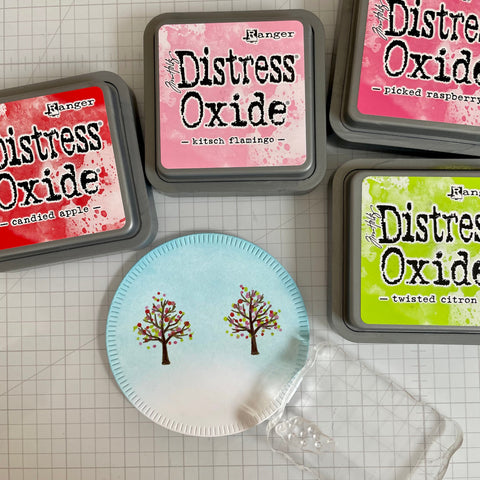
We then created the small scene for the inside of the card. We cut the green stitched circle die cut in half to create a small hill. On the white circle die cut, we stamped two trees with brown Distress ink and then ink-blended green ink on the top of the green hill and blue on the sky of the white circle die cut.

Using Distress Oxide inks and the small stamp of dot clusters, we added spring-like blooms to the bare trees with pink, red and bright green colors.
Using liquid glue, the green ink-blended hill was adhered to the bottom of the white circle die cut. Foam squares were added to the back of the yellow house which was then adhered to the center of the circle.

We wanted to add some texture to the white card panel so we created a simple diagonal striped pattern using a score board.

The sentiment was cut three times from the same gray cardstock used to mat the card panel. These were stacked and adhered together with liquid glue.

To assemble the card, the gray mat was adhered to the card base followed by the embossed white panel with liquid glue. The pink, orange, teal and purple houses were adhered to the panel with liquid glue and foam squares. The sentiment was then adhered with liquid glue.

Finally, the finished circle scene was adhered to the inside of the card base with liquid glue and positioned so that it was centered through the opening on the front when the card was closed. To complete our card, we stamped “Welcome to the neighborhood” on the inside of the card with black ink.

We hope you enjoyed our project and will give it a try.
Crafty hugs!
Maureen and Michele
Supply List:
House Stamps and Die: Hero Arts – A Warm Welcome
‘Hello’ Word Die: Honey Bee Stamps – Bitty Buzzwords
Stitched Circle Die: Pinkfresh Studio – Blanket Stitched Circle
Plain Circle Die: Spellbinders – Essential Circles
Black Ink: Tsukineko – Versafine Onyx Black (for inside sentiment)
Distress Oxide Ink: Ranger – Kitsch Flamingo, Candied Apple, Picked Raspberry, Twisted Citron
Distress Ink: Ranger – Walnut Stain, Mowed Lawn, Tumbled Glass, Broken China
Embossing Ink: Tsukineko – VersaMark
White Embossing Powder: Nuvo – Glacier White
Liquid Adhesive: Bearly Art - Precision Craft Glue
Foam Adhesive Squares: 3L – 3D Foam Squares (White Variety Pack)
Cardstock:
White: Hammermill Premium Cardstock 100 lb
White Card base: Accent Opaque 120 lb
Concord & 9th – Mushroom, Parsley, Honeysuckle, Marmalade, Oceanside and Buttercup
Purple: from scrap bin (source unknown)

