

HEY FRIENDS! This is Nancy from Rowhouse Greetings and I’m back today with a new project featuring stamps and dies from Honey Bee Stamps. I did something a little different today, choosing to create a simply designed sympathy card in slightly muted colors and beautiful fonts.
Today’s project features:
- Lovely Layers: Magnolias Dies by Honey Bee Stamps
- Miss You Big Time by Honey Bee Stamps
- Folk Edge Rectangle Dies by PinkFresh Studio

I started by cutting a piece of heavy-weight white cardstock to 4.25” x 11” scored at 5.5” for the card base. Then I created the background by cutting a piece of soft gray cardstock to 4.25” x 5.5”.
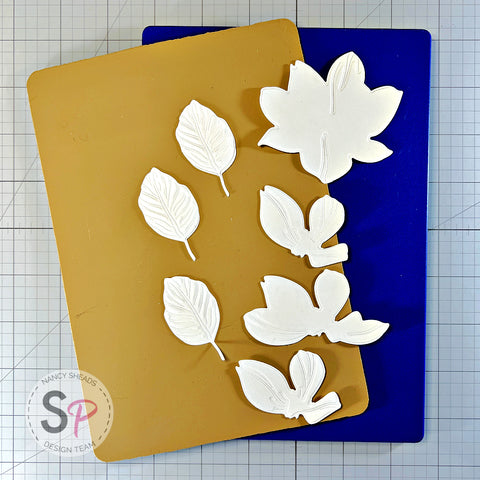
Next I used the Lovely Layers: Magnolias Dies by Honey Bee Stamps to cut the shapes from white cardstock. I cut out an extra leaf not shown here for the final card design.

Afterward, I placed the die cuts back into the dies and ran them through my die cutting machine a second time to emboss them. I have a Spellbinders Platinum 6 and used the recommended embossing sandwich that consists of (from top to bottom) an embossing plate, the tan embossing mat, the die cut and die (cut side up), and the platform. The sandwich may vary depending upon the brand of your machine.
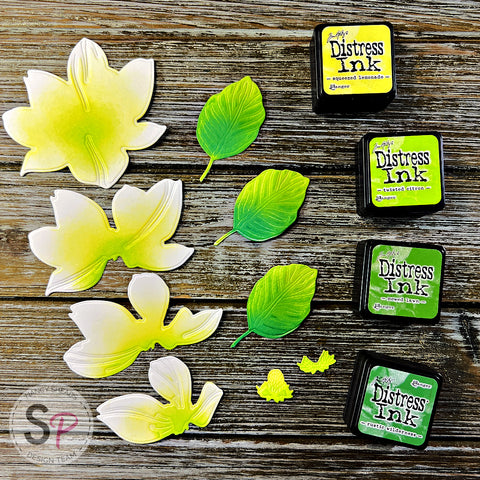
Next, I ink blended the die cuts using Distress Ink and Mini Ink Blending Tools with a Domed Foam Applicator. For the flowers, I used Squeezed Lemonade and Twisted Citron, keeping the color closer to the center for the top flower layers and building out from the center for the bottom layers. For the leaves, I put down a base coat of Twisted Citron and added layers of Mowed Lawn, and Rustic Wilderness.
I assembled the layers of the flower as shown below, using a little Designer Adhesive by Art Glitter in the center of each layer to hold the flower together. I gently bent the petals forward to add some dimension.
I cut a piece of white cardstock using the medium size Folk Edge Rectangle Die by PinkFresh Studio. I stamped the sentiment from the Miss You Big Time stamp set by Honey Bee Stamps using Versafine Clair in Nocturne. I’m notorious for smearing pigment ink after I’ve stamped sentiments so I added some Nuvo Embossing Powder in Crystal Clear and heat set the ink.

I used Designer Adhesive by Art Glitter to adhere the magnolia and leaves to the front of the sentiment die cut and added Crafty Foam Tape - White by Scrapbook Adhesives to the back. I assembled the remaining layers as shown.
That’s it for me today! I hope you enjoyed today’s project and I’ll see you back here again soon.
Nancy
Supplies
- Lovely Layers: Magnolias by Honey Bee Stamps
- Miss You Big Time by Honey Bee Stamps
Folk Edge Rectangle Dies by PinkFresh Studio - Distress Inks in Squeezed Lemonade, Twisted Citron, Mowed Lawn, and Rustic Wilderness
-
Versafine Clair in Nocturne by Tsukineko
- Nuvo Embossing Powder in Crystal Clear
-
Mini Ink Blending Tools by Ranger
-
Mini Domed Replacement Foams by Ranger
-
Designer Adhesive by Art Glitter
- Crafty Foam Tape - White by Scrapbook Adhesives

