
Hello Crafters!
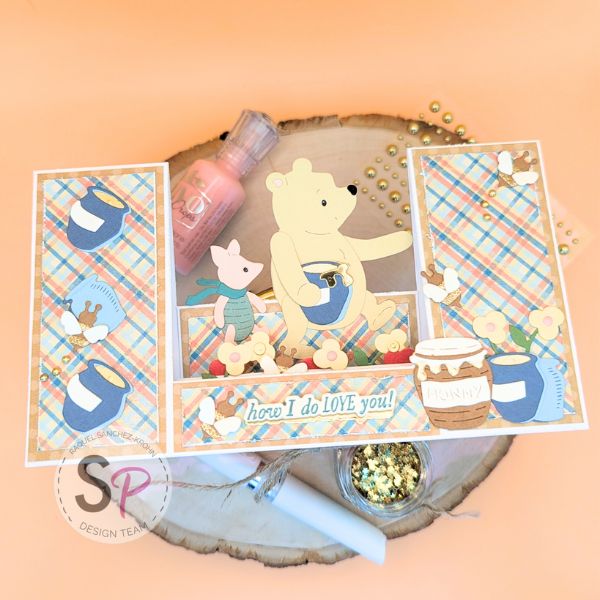
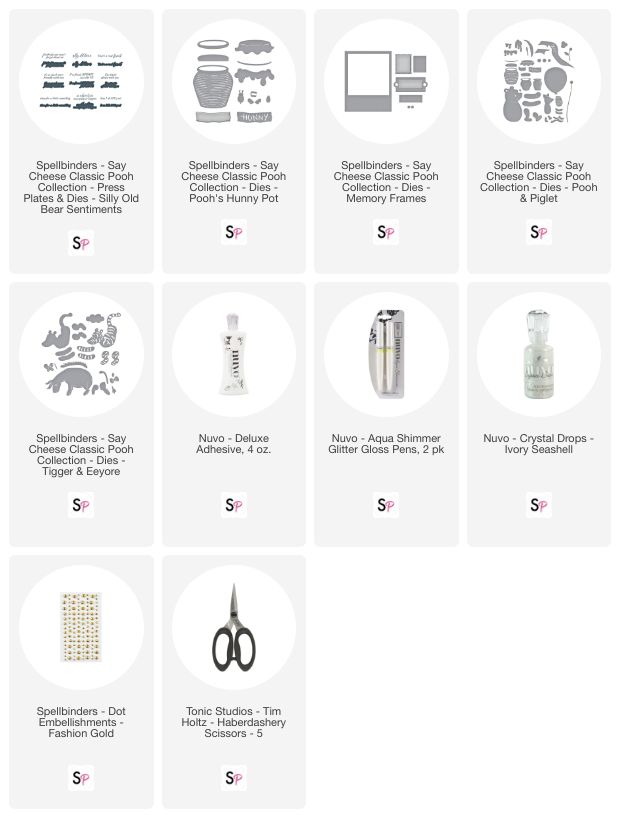
Raquel here from @paintsandglitter bringing you an adorable Center Stepper Card created with the amazing Spellbinders Collection: Say Cheese Classic Pooh. This collection consists of more pieces listed at ScrapbookPal.com, but today I will be using Pooh & Piglet, Poo’s Hunny Pot, and the Silly Old Bear Sentiments. This card will make a lovely centerpiece and you can substitute any of the sentiments included to make it suitable for any occasion!
I will include photos of the card measurements, cutting and scoring lines to make the assembly of the base much easier. Once all lines and cuts have been made, top the front and back of card with the correct size matting layers. Use 5” scissors to shabby the edges of the plaid matting layers.


Begin assembly with the small flowers. You will need six yellow flowers and three pink petal portions. These will layer along the center of the middle step of the card, and the bottom right column. Cut and layer light and dark blue pots along with the golden mirror card to create more depth and shine. Reserve one to tuck behind Pooh bear’s front paw and top it with golden honey made of shiny gold mirror card. The rest of the pots will adorn the left column and bottom right column of the card. Be sure to stagger them for a topsy-turvy look.
Assemble Piglet and Pooh, reserving a duplicate base layer of each that you can adhere to the back of the card to make for a sturdy construction. Be sure to also use all layers as seen in the video. Next, add the layers to the small bees starting with the glitter gold stripes, then the little wings, which I cut out of watercolor card. Lastly, adorn the centers of flowers using small circle die cut pieces, Nuvo drops, add shine to the bee wings with Nuvo Glitter Gloss and make bee trails with the Fashion Gold Pearls. All steps are included in my video tutorial which will let you see the assembly up close. I hope this tutorial helps you create this fun card, and as always, that you
Be inspired, Be Blessed!
RaquelSK
Video Tutorial:
Supplies Used:


Comments
It’s so great that Pooh is now available
#scrapbookpalgiveaway
This is adorable! #scrapbookpalgiveaway
#scrapbookpalgiveaway
Cute card! Thanks for the tutorial 😀
Love Pooh 💛💛 #scrapbookpalgiveaway
Winnie the Pooh is a classic! This card makes me smile – adorable 🥰