Step 1:
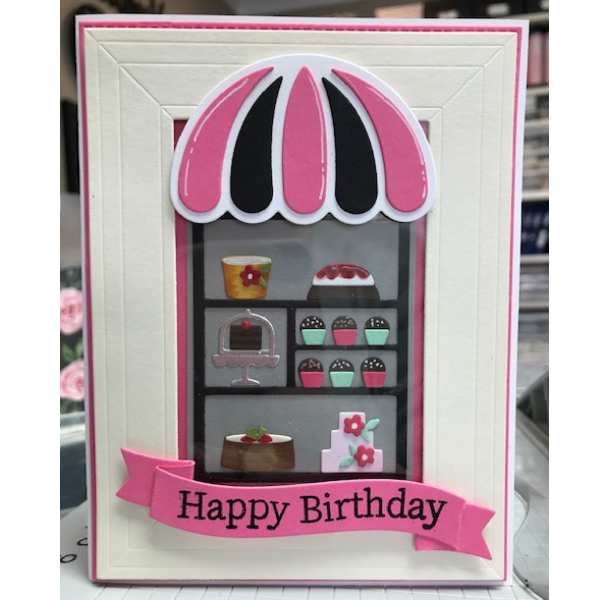
Cut out bakery treats from white and colored cardstock and assemble. I used some Copic markers to add details on the cakes and a white gel pen to make sprinkles on the cupcakes. I also used Nuvo Crystal glaze on top of the fruity topping and cherry on the chocolate cake.
Step 2:
Cute out awning and bakery rack. Add details with white gel pen.
Step 3:
Cut out frame or make one with some nesting rectangles. Adhere some acetate to opening of frame. Apply foam tape on back of frame.
Step 4:
Arrange and glue bakery rack to a background layer being careful to line up the opening with the frame.
Step 5:
Adhere bakery treats to rack
Step 6:
Place frame over the top of the bakery rack and adhere awning (also with foam tape).
Step 7:
Cut out banners and emboss Happy Birthday from the Sugar Coated Sentiments set. I arranged my stamp to curve slightly to fit the curve of the die banner.
Adhere to the card with foam adhesive and panel to the card base.
Instagram: @kaycbyk
Products Used:
Spellbinders Etched dies -Sweet Shoppe S4-1098
Spellbinders Sugar Coated sentiments STP-027
Lawn Fawn Fancy Wavy Banners LF1923
Copic Markers
Scrappy tape ST38
Nuvo Crystal glaze 947n
Lawn Fawn glue tube LF1664
Gina K embossing powder Detail white GK-50328
Scrapbook Adhesive Crafty foam tape white 1618
Cardstock
Acetate
MFT Framed die-namics


