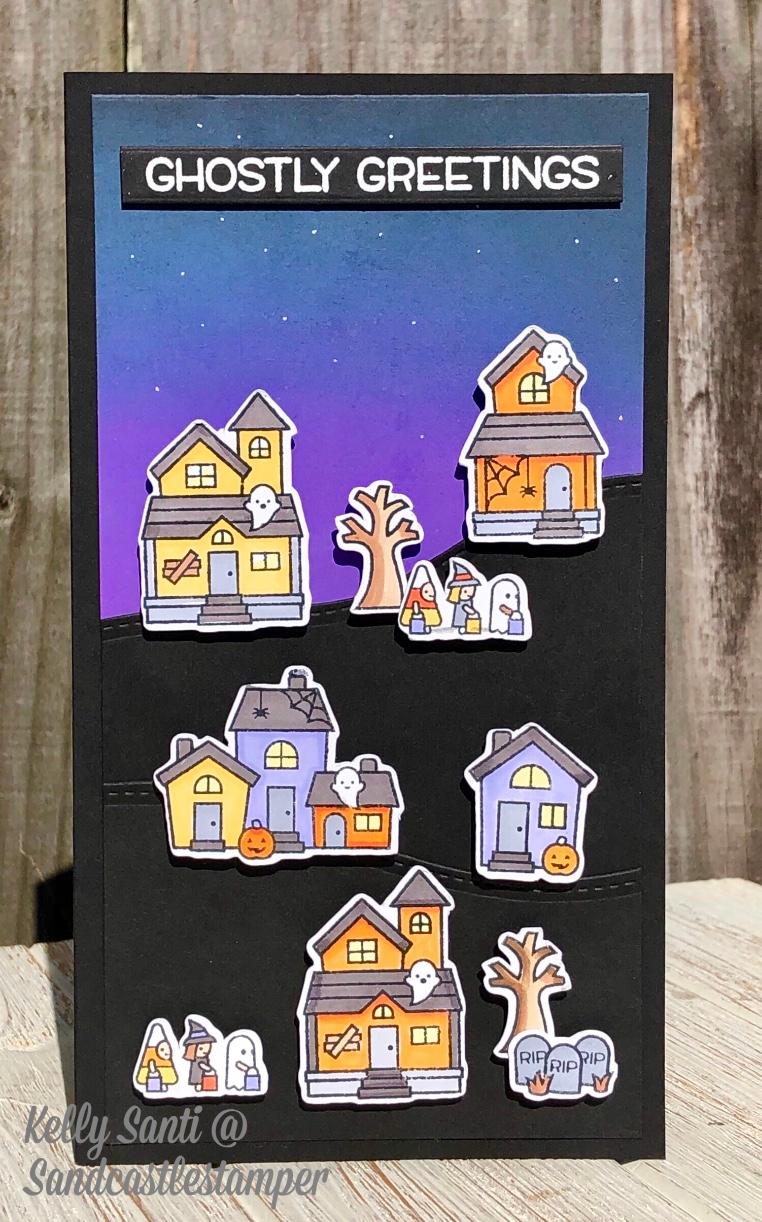
Hi everyone - Ghostly Greetings to you! I created this spooky village by using stamps, paper, dies, markers, and more.
Let me share with you the creative process!
1.First, I stamped the Lawn Fawn 'Spooky Village' stamps onto white cardstock and used my Brother Scan n Cut to cut the images out, however, there is a matching die set in the Scrapbook Pal store! I then colored the images with prismacolor markers in Halloween colors and set those aside.
To assemble my card, I chose a tall format. This card is 8" x 4" in size and I've used heavy weight black cardstock as a base. I started with an A2 size white cardstock panel and used Ranger Ink distress oxide inks to blend a night time spooky sky. The ink colors I used are Ranger Faded Jeans, Black Soot and Wilted Violet and the Ranger Ink mini blending tool was perfect for acheiving the look!
2. I added a few stars by using a white gel pen.
3. Once that dried, I used Pink and Main scallop wave die to create hills for the village neighborhood.
4. Once those were cut, I used Tombo Mono Adhesive to secure them to the background started at the base of the night sky panel and elongated it downward to make the card taller. The panels run about 2.5" tall and 3.50" width and are layered.
I assembled the colored house, trick-o-treaters, trees and tombstones in a random order and popped them all up on foam dots from Scrapbook Adhesives 3L for dimension and character!
5. The last part of the project was stamping and embossing the Ghostly Greetings sentiment and heat embossing it to give the sentiment some pop!
Thanks for reading about my Spooky Village card!
Happy Crafting!
Kelly Santi
Blog: https://sandcastlestamper.blogspot.com/
Instagram: miaimikel4
Products Used:
Lawn Fawn Clear Stamps Spooky Village - SKU: LF2014
Tombow Dispenser Adhesive - SKU: 62106

