Hey everybody, happy Wednesday! Do you like having a variety of extra cards in your stash? I sure do, and I love those that are super easy to mass produce and change up with different colors. Leslie here sharing a tutorial for making a pretty thank you card featuring the Altenew Enchanted Roses Stamps and Dies. This card might be clean and simple but it’s mighty and sure packs a punch. I always love and appreciate the amazing details Altenew puts into their products! Let’s get started!
CUT CARD BASE & LAYERS
Cut a standard A2 size side-folding card base from heavyweight white cardstock.
Next, cut a 4” x 5-1/4” inside layering panel from green cardstock.
Additionally, cut a 3-3/4” x 5” inside layering panel from lightweight white cardstock.
Finally, grab a couple extra pieces of heavyweight white cardstock for stamping images and sentiments.
STAMP FOCAL IMAGE
Using the MISTI, stamp the focal image from the Altenew Enchanted Roses Stamps in Catherine Pooler Eucalyptus ink on white cardstock.
Cut the image with the coordinating Altenew Enchanted Roses Die secured with Spellbinders 1/4" Best Ever Craft Tape. Leave the stamp in the MISTI for the next step.
STAMP EXTRA FLOWER
Ink up just the flower in Memento Tuxedo Black ink and stamp it on white cardstock.
Color the flower with Copic Ciao BV02 Prune and then fussy cut it using the Spellbinders Detail Scissors. Run a black marker around the outside edge for a more finished look.
ADHERE FOCAL IMAGE
Using the My Sweet Petunia Glue Press with Bearly Art precision craft glue, adhere the focal image to the front of the card base.
Next, adhere the extra fussy-cut flower.
ADD SENTIMENTS
Stamp the front and inside sentiments from the Altenew Enchanted Roses Stamps in Memento Tuxedo Black ink on white cardstock and cut them with the coordinating Altenew Enchanted Roses Dies secured with Spellbinders 1/4" Best Ever Craft Tape. Using the My Sweet Petunia Glue Press with Bearly Art precision craft glue, adhere the front sentiment to the upper left corner of the card front. 
Next, adhere the inside sentiment to the white cardstock panel and then adhere the panel to the green cardstock layer. 
COMPLETE PROJECT
Add a few iridescent gemstones to the card front for a little bling. 
Finally, adhere the inside panel to the inside of the card base, which will complete the project.
I hope you've enjoyed this clean and simple thank you card and I hope I’ve inspired you to check out the gorgeous Altenew Enchanted Roses Stamps and Dies! Imagine replenishing your stash with a pile of these cards in different colors! Be sure to visit ScrapbookPal on Facebook, Pinterest and Instagram for more design team inspiration! And if you haven't yet subscribed to our YouTube Channel, be sure to do that, too, for tons of hands-on crafty inspiration! Thanks so much for stopping by today – we’ll see you next time!
Scrappy hugs,
Leslie
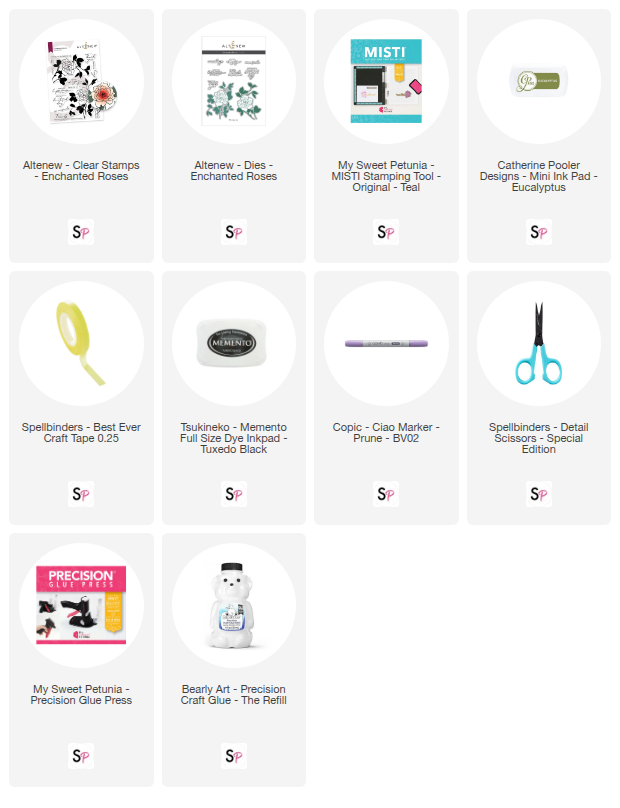
Supplies: