
Hey Friends! Nancy here from @rowhousegreetings with a holiday post featuring new products from Pinkfresh Studio. I love making holiday cards year round, especially cards that can be pulled together quickly. And I love finding different uses for my supplies as you’ll see below.

So let’s get started! I decided that I would stencil the background first, so I pulled out my Swirl Background from Pinkfresh Studio. This set consists of five layering stencils which are numbered in the upper left corner, although as you’ll see you don’t necessarily need to use them in order.
I cut a piece of white cardstock to 4-¼” x 5-½” and stuck it to my work surface with EZ Dots Repositionable Tape. I work on a glass magnetic surface so I held the first stencil in place with magnets, but you could use a low tack tape or washi tape to hold the stencil in place.
I started with the first stencil and lined up the corners of my paper with the guidelines on the stencil and applied a base coat of Distress Oxide in Twisted Citron. I worked dark to light from the center out, applying Evergreen Bough near the center followed by Mowed Lawn and Twisted Citron. I knew that I would be using the same colors for Stencil 3, so I skipped Stencil 2 temporarily and blended the same way as Stencil 1. When finished, my design appeared as below.

Next, I aligned Stencil 2 in place and applied a base coat of Worn Lipstick. Once again, I worked from dark to light from the center out, applying Barn Door, Abandoned Coral, and ending with Worn Lipstick. I blended Stencil 4 the same way and when finished, my design appeared as below.

Next, I positioned Stencil 5, applied a base coat of Mustard Seed and added Spiced Marmalade to the center and blended out once again with Mustard Seed.

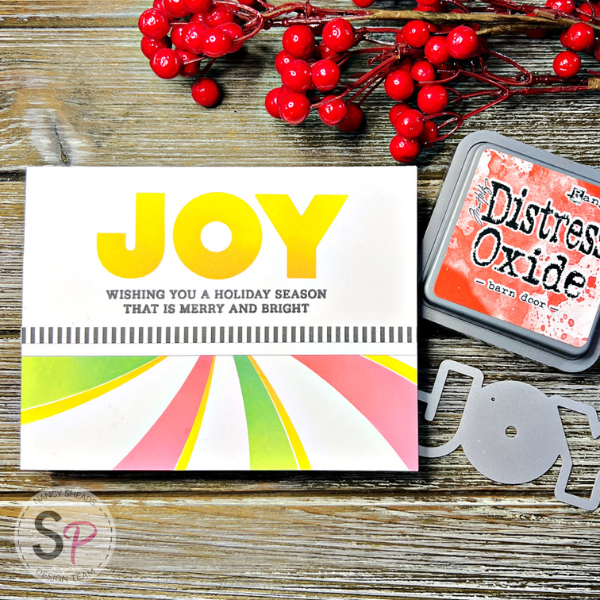
So here’s where I had to rethink my design. When removing one of the stencils, I accidentally smeared the ink, but at least half of the stenciled design was OK so I knew that I could salvage the stenciling. I cut it roughly in half and glued it to my card base. I cut another piece of white cardstock large enough to overlap the edge of the stenciled background (mine is 2-⅝” x 5-½”). I cut a piece of striped design cardstock to ¼” x 5-½” and glue along the bottom and stamped above it with one of the sentiments from the Ornaments Stamp Set by Pinkfresh Studio in Versafine Ink.
I planned on using the Joy Die by Pinkfresh Studio to cut cardstock letters, but I didn’t have any cardstock that looked right with the colors in the stencil. I thought about using the Joy Hot Foil Plate by Pinkfresh Studio, but neither foiling nor glitter cardstock looked right to me.
Finally, I decided to use the Joy Die to cut a stencil from a piece of Masking Magic that I could use to ink blend the letters. I placed the die on a piece of Masking Magic and ran it through my die cutting machine. As you can see, I ended up with both the negative and positive image of the die.

I adhered the mask in place on my card and ink blended the letters using Mustard Seed and Spiced Marmalade. I removed the mask and my letters were perfectly inked. This time, the letters coordinated perfectly since I was reusing inks from the previous stencil.
Let’s take one more look at the finished card.

That’s all for me today! Hope you enjoyed today’s project and you find alternate uses for supplies in your stash.
Nancy
SUPPLIES
- Swirl Background by Pinkfresh Studio
- Joy Die by Pinkfresh Studio
- Ornaments Stamp Set by Pinkfresh Studio
- Distress Oxides in Twisted Citron, Mowed Lawn, Evergreen Bough, Worn Lipstick, Abandoned Coral, Barn Door, Mustard Seed, and Spiced Marmalade
- Masking Magic by Gina K. Designs
- Versafine in Onyx Black by Tsukineko
- Mini Ink Blending Tool and Domed Replacement Foams by Ranger
- EZ Dots Repositionable Tape - Scrapbook Adhesives

