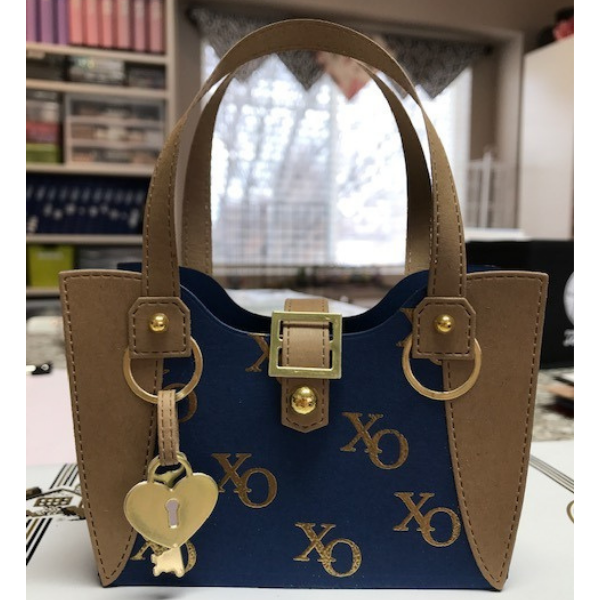
WARNING! These darling bags are very addictive to make. I can’t stop making them!
Step 1:
Cut out two of the large bag pieces. You can get two easily from a sheet of cardstock. Stamp and emboss with the XO from the coordinating stamp set with gold embossing powder. Fold where the lines are.
Step 2:
I used some Scrappy Tape and applied it to the bottom flap of the front of the bag piece. You can decide which is the front and which is the back. If one turned out better than the other you will want that as your front.
Step 3:
Peel off the back of the adhesive and place the back of the bag piece as shown below.
Step 4:
Cut out 4 front side “leather” pieces, the 2 handles, 2 of the side bag pieces and 4 of the little handle tabs and one closure strip and one skinny accessory strip. 4 gold rings, 2 gold buckles and a key and both hearts.
Step 5:
Adhere the 4 front “leather” pieces with glue as shown below.
Step 6:
Take the 2 side rectangles and fold where the lines are and attach to the side flaps. You will want to use the top of the triangle as your guide. I am pointing to it with my paper piercer.
Step 7:
Apply your adhesive to the folded tabs and secure to the purse front and back on both sides to form the bag.
Step 8:
Give the straps, closure and accessory strip some curve by running it through your thumb and a bone folder.
Step 9:
Apply some Scrappy Tape to the inside ends of the handles, one end of the closure and the 4 handle tabs and shown below. Peel off backing and apply some glue for added strength.
Step 10:
Apply the handle as shown below to both sides of the bag.
You will want to hold them for a minute to make sure they are good and secure as the handle will have some tension.
Step 11:
Glue the two buckles pieces together so there is gold on both sides.
I glued the heart locket to the other heart to make it look more finished.
Step 12:
Decide which gold ring you want the locket to hook to. You can either get that ready and put it through the ring before you glue on the rings or leave a small portion of that ring free of glue to slip it through at the end.
Glue on the fold rings and tabs on each of the 4 handle ends as shown below.
Step 13:
To make the accessory add your key and locket and thread it through the gold ring and glue to form a loop.
You're done! Lots of steps but definitely worth it.
These would hold 2 bakery sized cookies, a big brownie, a gift card and some treats. There is quite a bit more room than the purse die.
Hope you have as much fun as I am!
Instagram: kaycbyk
Products Used:
Concord and 9th Dies Weekender Bag - SKU: 11024
Concord and 9th Clear Stamps Weekender Bag - SKU: 11025
Scrappy Tape 3/8" x 30 yds - SKU: ST38
Lawn Fawn Glue Tube - SKU: LF1664
VersaMark Watermark Ink Pad - SKU: VM-001
Lawn Fawn Embossing Powder - Gold - SKU: LF1539
Taylored Expressions Bubbles (ALTERNATIVE - SpellBinders Color Essentials Gems - Gold Mix SKU: SCS-129)
Metallic Gold Cardstock
Lawn Fawn Paper Bag Cardstock
Navy Cardstock


