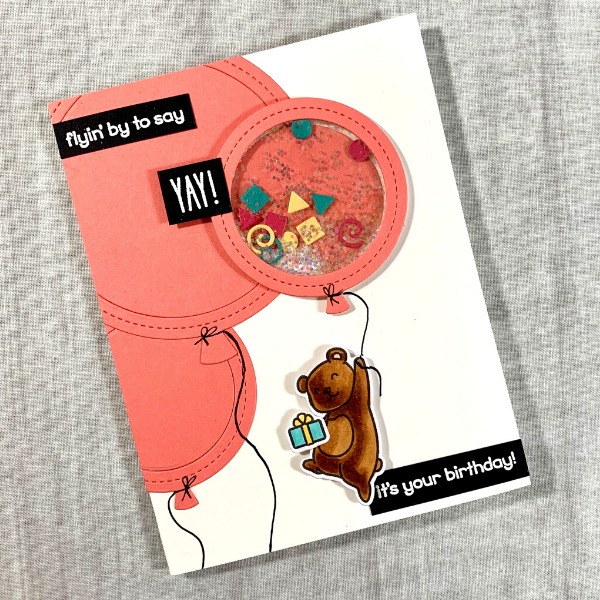
Hello there my crafty friends, this is Cassie back with another card tutorial for you. Today we will be making an easy shaker card using some of the newest Lawn Fawn products.
1. Start by die cutting 1 large balloon and 2 small balloons out of some cardstock using the Stitched Balloon Frames dies.
2.Cut out two circles from acetate with a circle die that would fit behind the smallest Stitched Balloon frame. If you don’t have a die to match, you can easily just freehand cut some circles. Don’t worry, they don’t have to be even remotely perfect since they will be hidden behind those frames.
3.Use a small amount of Nuvo Deluxe Liquid glue to adhere one of the acetate circles behind one of the smallest balloon frames.
4.Trim down some Crafty Foam Tape, and adhere that around the frame. This will be the area you will use to put your shaker elements.
5.Put some shaker bits into your frame, and spoon in some Lawn Fawn Chunky Glitter using your Nuvo Spoon.
6.Now close up your shaker by adding the second acetate circle to the back. Set it aside.
7.Stamp your images from the Really High Five stamp set by Lawn Fawn using Memento Tuxedo Black ink. Color your images with your Copic markers.
8.Cut out your stamped images using the matching dies.
9.Cut down a white card panel to the size of 5 ½” x 8 ½”. Score this at 4 ¼” using your Scor-Buddy.
10.Use the liquid glue to adhere down your other small stitched balloon and your big stitched balloon to your card base. Adhere the circle from your shaker balloon to the card base, and then attach your shaker right over the top.
11.Stamp your sentiment on the inside of the card, and adhere down your stamped balloon and bunny. Draw a string from the balloon to the bunny.
12.Stamp your outside sentiments onto some black cardstock using some Versamark ink. Cover that with some white embossing powder and heat set the powder with a heat tool.
13.Trim down your sentiments and adhere the first and third sentiments to the card front. Use some foam tape to adhere your second sentiment and your stamped bear to the front of your card.
14.Draw your lines for the balloons.
I hope that my method for making shaker cards was helpful and something that you’ll want to try. If you’d like to watch the video on how I made this card, head on over to our YouTube channel to see the process.
Thanks for stopping by!
Cassie
Products Used:
Lawn Fawn Clear Stamps – Really High Five
Lawn Fawn Lawn Cuts – Really High Five
Lawn Fawn Lawn Cuts – Stitched Balloon Frames
Tsukineko Memento Full Size Dye Inkpad - Tuxedo Black
MISTI Stamping Tool - Mini 6 x 7"
Scrapbook Adhesives Crafty Foam Tape – White
Copic Sketch Marker - Blush - R20
Copic Sketch Marker - Bougainvillaea - R43
Copic Sketch Marker - Egg Shell - E50
Copic Sketch Marker - Baked Clay - E99
Copic Sketch Marker - Burnt Umber - E29
Copic Sketch Marker - Aqua - BG15
Copic Sketch Marker - Maize - Y35
Copic Sketch Marker - Soft Sun - E21
Scor-Buddy Eighths Mini Scoring Board 9 x 7.5"


