Instructions:
Hello everyone!! My name is Berina, it's great to meet you all again, through Scrapbookpal blog. I have a quick and easy - yet elegant card to share with you, which you can customize for any occasion. I don't make square cards very often, but something about them just makes me swoon every time I see one. I think square cards look sophisticated and elegant in itself. So I decided to make one, to see how I like it. I made a matching envelope to go with it too. I have to say, I loved making this card and will be making more square cards in the future, as long as it's hand-delivered. Okay, enough babbling. Let me get to the card:
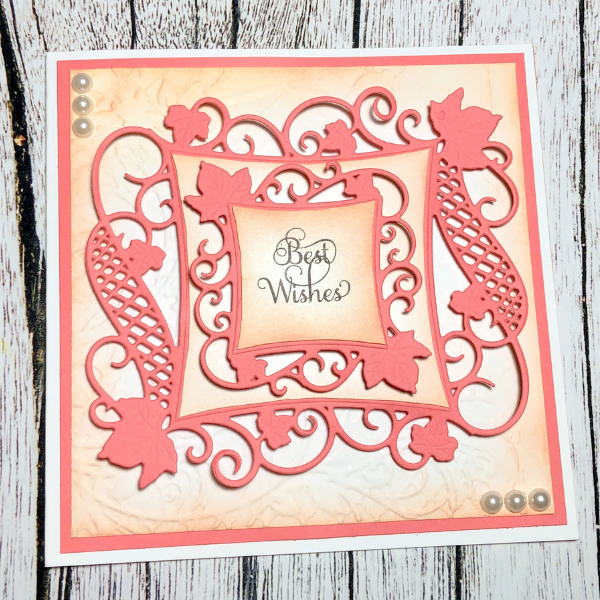
I have this beautiful Decorative Accents - Curved Square die from Spellbinders, which I've been itching to use on a card. I decided to use a white and coral color combo for this card. So I started with cutting the largest layer on a coral card stock. After die cutting it, I ran it through the machine again, this time with an embossing mat, to get those beautiful embossed details as well.
This kinda gave me an idea of the size of the card I wanted it to be. This looked like it will fit perfectly on a 5 1/2" square card, so I went ahead and cut my card base. I cut a piece of 5 1/2" x 11" and scored at 5 1/2" on the 11" side. Save the piece of card stock that was cut off as well - we will use a part of it :)
Then I cut the next layer with the die on a coral card stock. Then I ran it again with an embossing mat to get the embossed details.
Now I wanted to add a white layer in between these die cuts. So I used the die to trace out the curved square in the center of the die with a pencil. Then I cut it out with my scissors.
Here are the layers now:
Now I cut up layers for the card base. I cut a layer with Coral card stock which is a 5 1/4" square and a white layer which is a 5" square. The I embossed the white layer with an embossing folder I had. I used the Butterfly Trellis embossing folder by Crafter's Companion, you can use a different one too.
I tried to align all the layers on the card base and see how it looks. I always do this and take a picture to see how it looks.
At this point, I decided that I want to add a little bit of color to the white layers. Well, it does look good without the inking, but I wanted to add that 'extra' bit ;) So I inked the edges of all the white layers with Brutus Monroe Star Gazer ink. Then I stamped the sentiment from Just Rite stamps with Memento Tuxedo Black ink. Now I adhered all the layers - using foam tape for the 2 die cut layers.
A card this elegant on the outside needs something on the inside - right? So I decided to cut a piece of coral card stock with 2 of the dies from Spellbinders A2 Scalloped Borders Three.
I adhered this piece on the inside right, to give it a little special edge.
Now on to the envelope - I cut a coral card sock to 8 1/2" square. I use my Martha Stewart Scoring board to make envelopes. You can use envelope score board or any other score board with the triangle piece to make the envelope. I placed my 8 1/2" square piece along the triangle and scored at 3 1/8" on all sides. I folded the 2 side panels and adhered the lower panel on to it, to make the envelope.
I die cut the swirls and leaves from the Decorative Curved Squares die set and added it on the lower left on the envelope to coordinate with the card.
Here's the card and the envelope:
What do you think? I loved how this had turned out. The recipient liked it as well. Please let me know your thoughts and comments!
Thank you for stopping by today. Have a great day!
Instagram: @moxiecraftie
Blog: https://moxiecraftie.blogspot.com/
Products Used:
Spellbinders Nestabilities Decorative Accents Die Set - Curved Square UPC:879216028364
Spellbinders Borderabilities Card Creator Dies - A2 Scalloped Borders Three UPC:879216021952
Tim Holtz Non-Stick Micro Serrated Mini Snips - 5" UPC:836445008161
Tsukineko Memento Dew Drop Dye Inkpad - Tuxedo Black UPC:712353249004


