
Crafting. Ideas. Inspiration.
Take Your Crafting & DIY Projects Further With ScrapbookPal
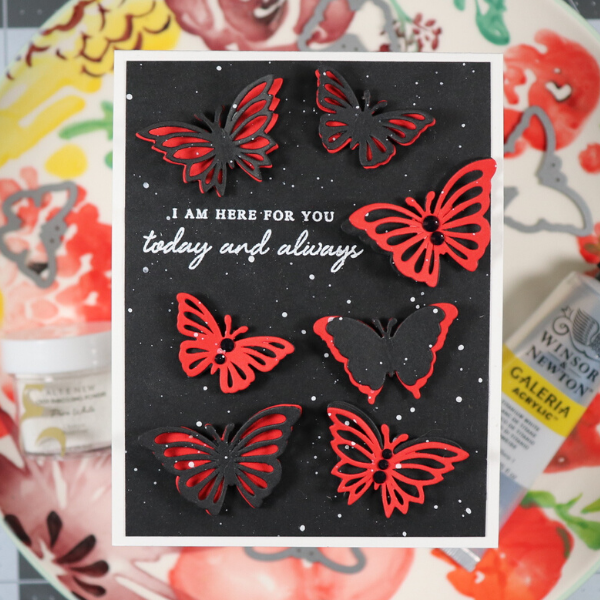
Altenew Mariposa Card
Hi everyone, it is Ricky back on the blog today and today I am sharing a card I made using the Mix & Match Mariposa Die...
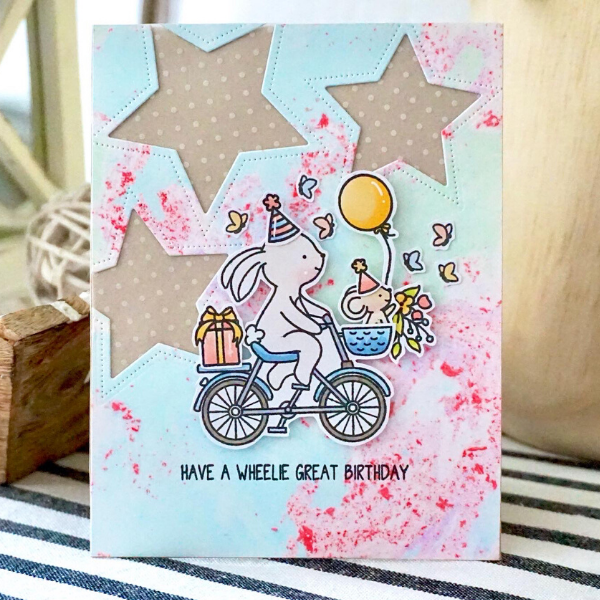
Wheelie Great Birthday Card by Annette
Instructions:Make card from kraft card-stock measuring 4.25x5.5 and set asideCut a piece of white card-stock the same size of card base.Put some water in a...
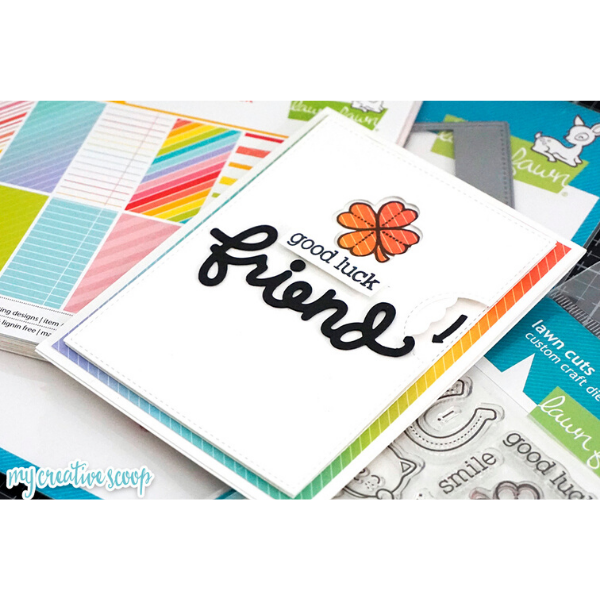
St. Patrick's Day Reveal Wheel Card
Hello! It’s Mindy from My Creative Scoop and today I’m sharing a fun St. Patrick’s Day card using the reveal wheel die from Lawn Fawn. Instead...
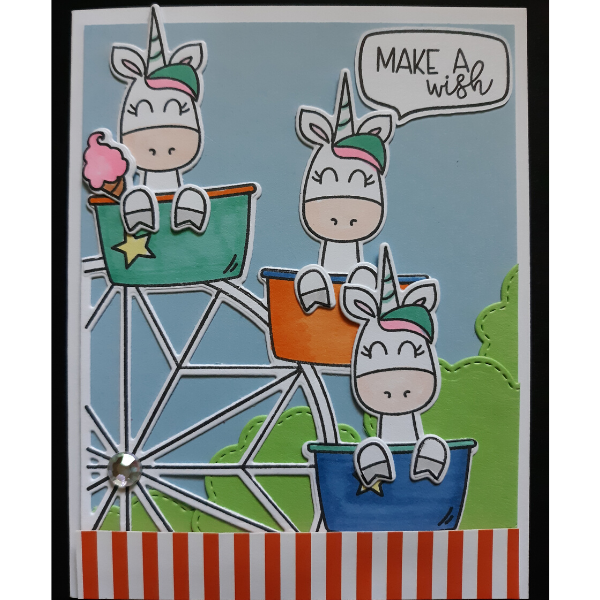
Make A Wish Card by Karen
Instructions:Step 1: Stamp and die cut animals and ferris wheel from Avery Elle Peek-a-boo Pets and Avery Elle Peek-a-boo Fair sets.Step 2: Color die cut pieces with Copic markers.Step 3:...
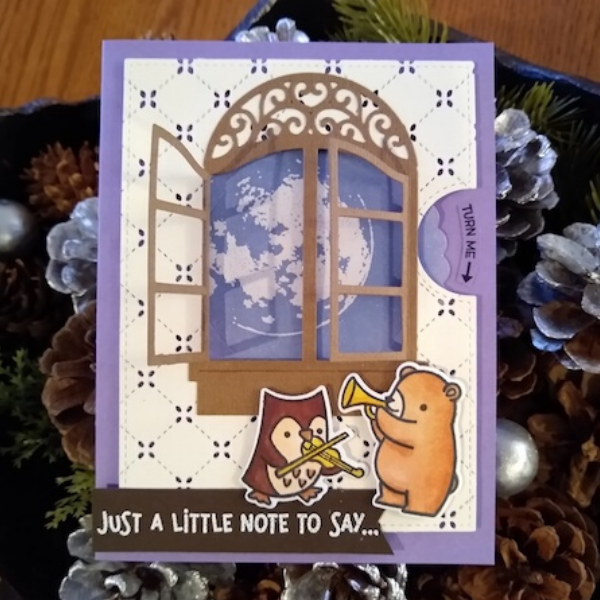
Reveal Wheel Love You to the Moon and Back by Lena
Instructions:Step 1: Die-cut a front panel using the Lawn Fawn Quilted Backdrop, then die cut it again with Reveal Wheel large panel. Die-cut a window frame,...

Comparing Zig 2-Way Glues + How To Use
Comparing Zig 2-Way Glues:Zig 2-Way Glue Pens Acid free, Non-toxic and Xylene FreeZig 2-Way Glue from EK Tools is a liquid adhesive that can be used...
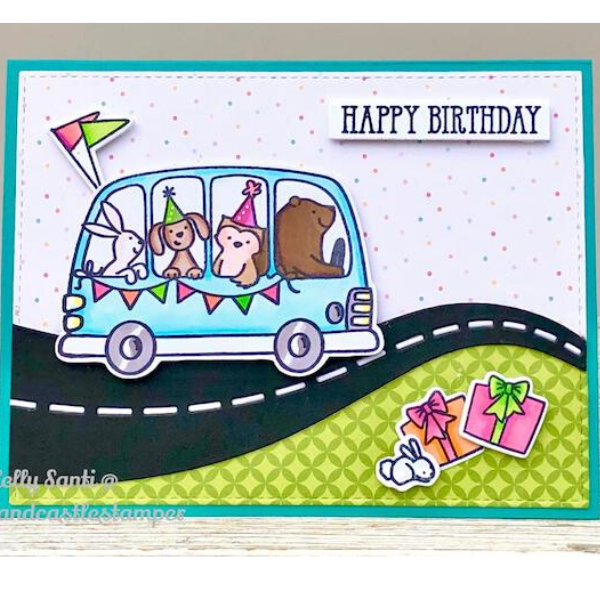
Birthday Bus Card by Kelly
Here's how I made this Birthday Bus card!1. I created this card by stamping the Avery Elle Birthday Bus critters in Momento Tuxedo Black Ink...
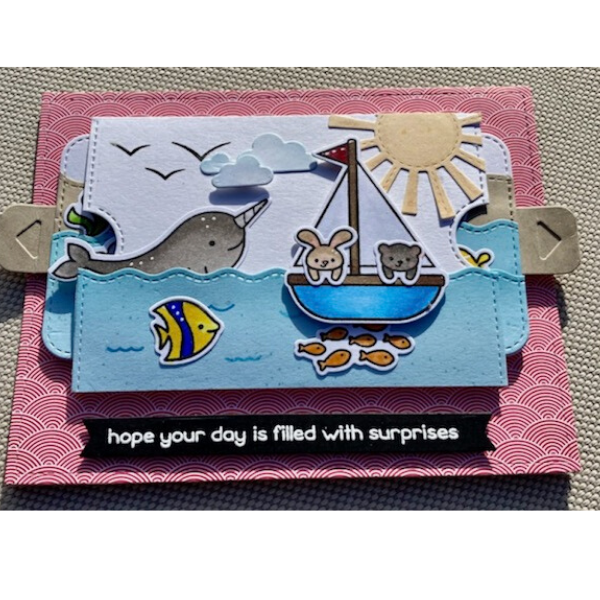
Smooth Sailing Slider Surprise Card
Hi everyone! Today I have a fun interactive card to share with you using the Lawn Fawn Double Slider Surprise die set as well as the Lawn Fawn...
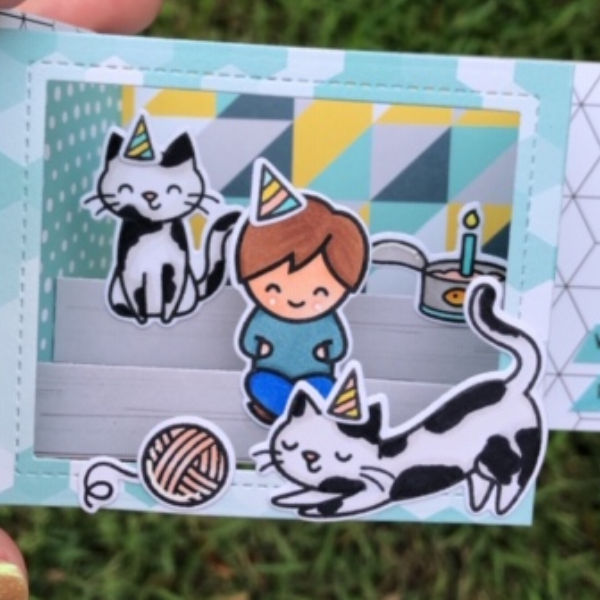
Birthday Shadow Box Card by Heather
It was recently my boss' birthday and I wanted to create a personalized card for him using his 2 kitties as inspiration! I started by...

Astronaut Birthday Card by Elena
This card is ready for a birthday party! I love the moon, handing out the cake, and everybody has a party hat on! The rocket...

Lawn Fawn Birthday Group-Peas and a Pivot Pop Up
Create Pivot Popup Panel: 1.Die cut the Lawn Fawn panel die twice out of white cardstock.2.Attach the two panels by placing each tab behind the oposite...
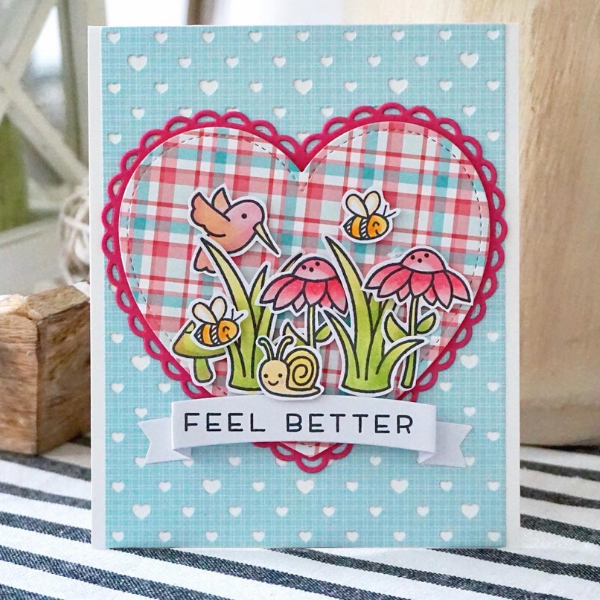
Feel Better Card by Annette
Instructions:Stamp and color all images using Copic Sketch markers. Using coordinating Lawn Cuts, die cut the images out and set aside.Make card from white card-stock...